
You removed the background from your image. The checkerboard pattern is right there in the editor, confirming the background is gone. You hit save, close the file, reopen it, and a solid white box fills the space where transparency used to be.
The problem is not in how you removed the background. It is in how you saved the file. The wrong file format or a single missed export setting will flatten your transparent background into a solid color, and you cannot undo it without starting over.
By the end of this article, you will know exactly which file formats and export settings keep an image with a transparent background intact every time you save it.
Table of Contents
Why Your Transparent Background Disappears When You Save
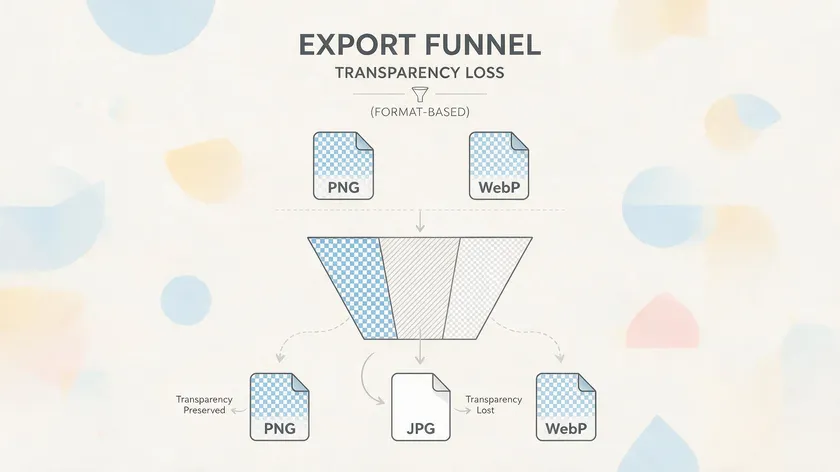
The most common reason a transparent background vanishes after saving is the file format. Many popular image formats do not support transparency at all. When you save to one of those formats, the editor must fill transparent areas with a solid color, usually white, before writing the file. That color becomes a permanent part of the image.
This guide covers only the export and save step. If you need to understand what “no background” means, how alpha channels preserve different levels of transparency, or how background removal works in the first place, the sibling article on what it is called when an image has no background covers those concepts in detail.
A correct export produces a file where the transparent areas remain transparent: you see the checkerboard preview in your editor, the image blends over any web page or design without a visible box, and soft edges or drop shadows stay smooth.
Transparent backgrounds allow seamless integration into various designs, from slide decks to e-commerce product pages.
The single most frequent failure mode is saving as JPG. JPEG does not support transparency. Every transparent pixel gets replaced with a solid color. Once that happens, you cannot recover transparency from the JPG file. You need the original layered project to export again.
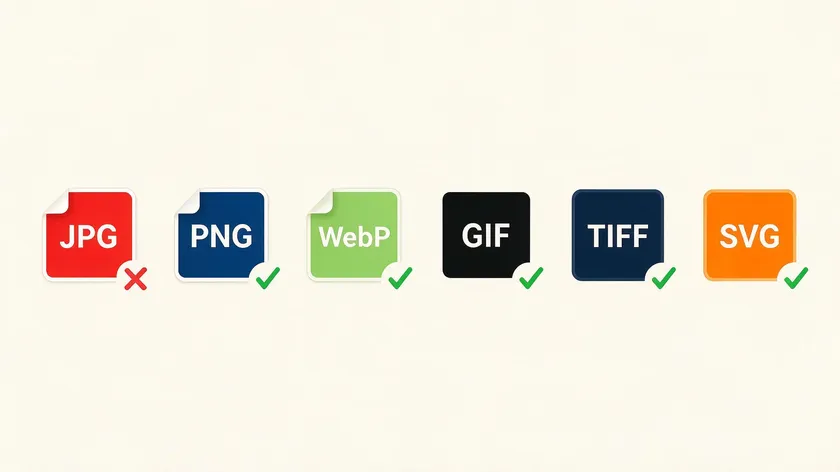
Choosing the right file type is the single most important step in keeping a transparent background after saving. The format you select determines whether the editor writes transparency data into the file or throws it away.
Here is how each major format handles transparency at export time:
JPG / JPEG
Does not support transparency. Transparent areas are always flattened to a solid color. Avoid JPG for logos, icons, and any graphic that needs to stand on a non-white background.
PNG (Portable Network Graphics)
The default for transparent images on the web. A PNG image supports a full alpha channel, meaning each pixel can be fully opaque, fully transparent, or anywhere in between. Transparent images are typically saved in PNG format because the results are predictable and compatible with every browser and operating system. The trade-off is file size; a transparent PNG is often 2x to 5x larger than an equivalent JPG.
WebP
Supports transparent images and is smaller than PNG by roughly 25-35% on comparable graphics. WebP supports both lossless and lossy compression with transparency, so you can tune the balance between quality and file size. Browser support sits above 95% as of mid-2026, but a few legacy email clients and older content management systems still do not render WebP correctly.
GIF
GIF only supports 100% opaque or 100% transparent pixels. There is no partial transparency. This makes edges around subjects look jagged, and drop shadows or gradual fades are impossible. GIF is rarely useful for clean, transparent graphics outside of simple animations.
TIFF
TIFF supports transparency but results in large file sizes, sometimes tens of megabytes for a single photo. It is common in print and archival workflows where quality matters more than storage. For web delivery, TIFF is overkill.
SVG
SVG is vector-based and has a transparent background by default. Use SVG for flat logos and icons; it offers infinite scalability and small file sizes. If your source art is shape-based (a logo, icon, or flat illustration), SVG is ideal. For photographs or raster content, stick with PNG or WebP.
High-quality transparent images enhance visual appeal in presentations, product mockups, and marketing materials. Transparent PNGs eliminate messy backgrounds in designs where your subject needs to sit on top of other elements. Match image formats to their use case for the best results.
| Format | Supports Transparent Background? | Typical Use Case | Recommended? |
|---|
| JPG | No | Photographs, large web images | No |
| PNG | Yes (full alpha) | Logos, UI, web graphics, presentations | Yes |
| WebP | Yes (full alpha) | Modern web delivery, icons, product photos | Yes |
| GIF | Yes (1-bit only) | Simple animations, legacy icons | Rarely |
| TIFF | Yes | Print, archival, high-quality workflows | Yes (when file size is acceptable) |
| SVG | Yes | Logos, illustrations, scalable art | Yes (for vector content) |
Rule of thumb: if you need a transparent background today, save as PNG first. Consider WebP for web performance when your audience uses modern browsers. Only save as PNG for transparency to ensure images are not flattened; never default to JPG.
How to Save a Transparent Image Correctly in Common Editors
Exact menus differ by app, but the pattern is always the same: confirm the background is transparent, choose a transparency-friendly format, and use the right “Export” command instead of the default “Save As.”
This section assumes you already removed the background using your preferred method or tool, whether that is manual masking, the magic wand, or an AI-based remover. The focus here is only the final export step.
Saving from Adobe Photoshop
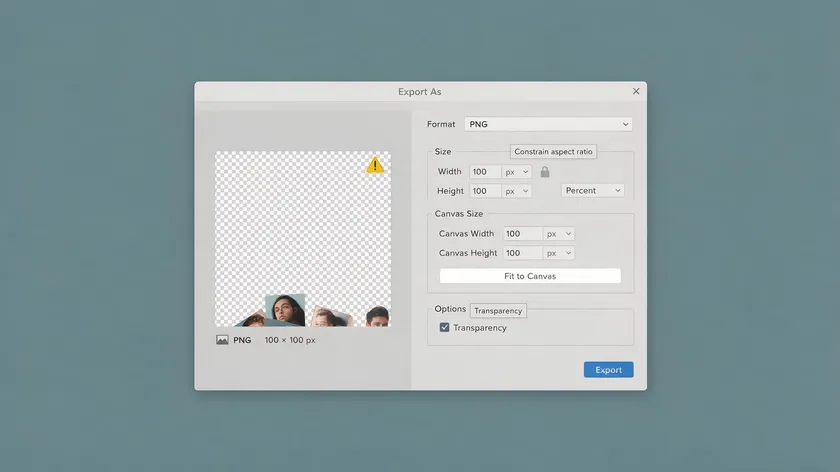
Open your file and verify the canvas. If you see a checkerboard pattern behind your subject, transparency is active. If you see a white or colored background, you likely still have a locked background layer. Remove the background layer (or hide it) to ensure transparency in the exported image.
Go to File, then Export, then Export As. In the format drop-down, select PNG. In the file settings panel, make sure to check the Transparency box. If you see an option labeled “Smaller File (8-bit),” leave it off when your image has soft edges, shadows, or gradients; 8-bit indexed color limits the precision of partial transparency and can produce visible banding on anti-aliased edges.
“Quick Export as PNG” also works on desktop, but on Photoshop for iPad, Quick Export sometimes flattens transparency. Use Publish & Export, then PNG, and verify that the transparency option is enabled.
Clear the matte color when exporting to avoid halos around edges. If a matte is set to white, semi-transparent edge pixels will be blended against white, creating a faint white outline that becomes visible on dark backgrounds.
Saving from Canva
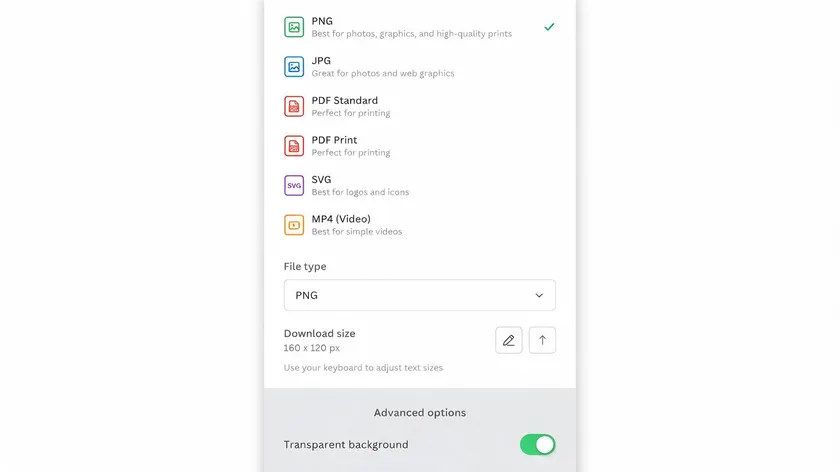
Canva’s tool removes backgrounds in seconds after you use its background remover on a photo. After the background is gone, click Download, select PNG as the format, and toggle the “Transparent background” switch on. If that toggle is off, Canva will add a white background to the file even though you chose PNG.
Canva does not currently offer WebP export with transparency. For Canva users, PNG is the only option that preserves a transparent background at download time.
Saving from Other Editors
The steps are similar across most image editing tools:
- Open or confirm that the background layer is hidden or deleted.
- Look for an option labeled “Export,” “Export As,” or “Download.” Avoid the generic “Save As” command when possible; it sometimes defaults to a format that does not support transparency.
- Select PNG or WebP from the format list.
- Check for any “Background color,” “Matte,” or “Canvas color” settings. Set it to none or transparent.
- Click Export and choose your save location.
Some online tools accept large uploads for background removal—certain services allow files up to 40MB, handle images up to 50 megapixels, or process multiple images simultaneously through batch modes. Regardless of which tool you use, verify the download format before clicking the final button.
Most automatic background-removal services default to PNG output with transparency. Still, double-check the format label before downloading. If you later reopen the exported PNG in another app and re-save it as JPG, you will lose the transparent background and see a white box again.
Quick Troubleshooting: When Your Transparent Background Turns White

Seeing a white or black box where transparency should be does not always mean the transparency is gone. Sometimes the issue is the viewer, not the file.
Common causes:
- Wrong format at export: You (or the tool’s default) saved the file as JPG instead of PNG or WebP. JPG will always fill transparent areas with a solid color.
- Background layer still visible: The editor kept a white or colored background layer active during export. Even a hidden-but-not-deleted layer can sometimes reappear depending on the tool.
- Viewer does not display transparency: File browsers and basic photo viewers on Windows and macOS often show transparency as white. This does not mean the transparency is missing; it means the viewer cannot render it.
- Matte or background fill applied: Some export dialogs blend semi-transparent edges against a matte color. If that matte is white, you get a faint white halo around your subject.
To verify, reopen the saved file in an editor that shows the checkerboard pattern behind transparent areas. Check exported images for actual transparency despite what a basic viewer indicates.
If transparency is truly gone, return to your original layered file (PSD, XCF, AFPHOTO, or whatever your editor uses). Hide or delete any solid background layer, confirm the checkerboard is visible, then re-export as PNG with transparency enabled.
Always keep a master file to retain original layers for future edits; once you flatten and close, your options shrink.
Test finished files against light and dark backgrounds to check for halos. Place your exported image on a black rectangle and a white rectangle. If you see a faint outline on either, re-export with the matte color cleared.
If file size is a concern, compress transparent PNGs or WebP files to reduce file size without loss of quality. Tools like TinyPNG or Squoosh can strip metadata and optimize compression without removing the alpha channel.
Images with transparent backgrounds can be resized without background issues as long as the output format still supports transparency and no solid fill is added during the process.
Before you click Export, verify three things:
- Format is set to PNG, WebP, or TIFF.
- No solid background layer is visible in the layers panel.
- The “Transparent background” or “Transparency” option is toggled on.
Key Takeaways
- Never use JPG for images that need a transparent background; it always flattens transparency to a solid color, usually white.
- PNG is the safest all-around choice for transparent backgrounds. WebP works well as a smaller, modern alternative, and TIFF is best reserved for print or archival files.
- This guide assumes the background is already removed. The real skill here is exporting correctly, not removing the background again.
- In any editor, look for “Export” or “Download” instead of the default “Save As,” then explicitly choose a transparency-friendly format and enable the “Transparency” or “Transparent background” option.
- If your image shows a white box after saving, do not try to fix the JPG. Go back to the original project file and re-export with the correct format and settings.
Now that you know exactly which format and export settings to choose, creating a properly transparent image is one step away. Discover how fast it is to remove your background and save a transparent PNG at removebackground.app.
FAQs
Why does my PNG still show a white background?
Two likely causes. First, the file may have been exported with a solid background layer still visible; the editor wrote that white layer into the PNG even though the format supports transparency. Second, you may be previewing the file in an app that renders transparency as white (Windows Photos and macOS Preview sometimes do this).
Reopen the file in an editor that displays the checkerboard pattern. If the checkerboard is there, your transparency is intact. If it is not, go back to the original project, hide the background layer, and re-export as PNG with transparency enabled.
Can I turn a JPG into an image with a transparent background by just changing the file extension?
No. Renaming a .jpg file to .png does not add transparency. The file still contains the same pixel data, including the solid background color that JPG wrote in place of the original transparency.
To get a transparent background, you need to remove the background in an editor or background-removal tool, then export the result as PNG, WebP, or TIFF.
Is PNG or WebP better for transparent backgrounds on a website?
Both support full alpha transparency. WebP typically produces files 25-35% smaller than equivalent PNGs, which means faster page loads. PNG remains the most universally compatible option, readable by every browser, email client, and design tool.
Many sites serve WebP to modern browsers and keep PNG as a fallback. If your audience primarily uses current browsers, WebP is the leaner choice. If broad compatibility matters (email newsletters, older CMS platforms), stick with PNG.
Do transparent images affect print quality?
Transparency itself does not reduce print quality. For print workflows, designers often use TIFF or high-resolution PNG files with transparent backgrounds, making sure the resolution is set to at least 300 DPI for the final output size.
The alpha channel adds no noise or artifacts; it simply tells the printer which areas have no ink. Keep the file in the correct color mode (CMYK for commercial print and RGB for digital), and the output will be clean.
Can I keep a transparent background when resizing or compressing an image?
Yes. Resizing or compressing a PNG, WebP, or TIFF preserves transparency as long as the export format still supports it and you do not add a solid background layer during the optimization process. Avoid re-saving as JPG at any point in the pipeline; that single step will permanently replace the transparent background with a solid color.