
Shopify product and collection images can be any size up to 5000 × 5000 px, but 2048 × 2048 px square is the size Shopify says usually displays best. A consistent shape across your catalog matters far more than raw pixel counts—it keeps grids aligned, collections tidy, and customers focused on your products instead of your layout.
This guide covers the verified Shopify numbers, the right file formats, and a step-by-step workflow for preparing each photo so it uploads cleanly and displays without surprises.
Table of Contents
Shopify Image Sizes at a Glance (Fast Answer)
What size should your Shopify images be? Shopify recommends product images be 2048 × 2048 pixels for square photos, with an upper ceiling of 5000 × 5000 px (25 megapixels) and a maximum file size under 20 MB. These limits apply equally to both product and collection images.
Shopify automatically creates smaller versions of each uploaded image for different parts of your theme, so you don’t need to export a dozen sizes yourself. But the master file you upload is the foundation for all of those versions, so it needs to be sharp, clean, and correctly framed.
The single most impactful decision you can make is choosing one consistent aspect ratio for every main product photo. Most sellers pick a square (1:1) because it aligns naturally with grid layouts across Shopify themes. When every featured image shares the same shape, your collection pages look more polished on both mobile and desktop.
The rest of this article walks through shopify image size recommendations in more detail, compares file types, and shows you how to prepare each photo—from background cleanup to final export—so your uploads display consistently across your entire store.
Shopify Product Image Size: Recommended and Maximum
This section focuses specifically on shopify product image size for your main catalog and product page photos—not banners, slideshow images, or blog images. Here are the numbers directly from Shopify’s product media documentation:
| Setting | What Shopify Says |
|---|
| Maximum dimensions | 5000 × 5000 px |
| Maximum resolution | 25 megapixels |
| Maximum file size | Under 20 MB |
| Square size that usually displays best | 2048 × 2048 px |
| Supported image file types | PNG, JPEG, TIFF, BMP, GIF, SVG, HEIC, WebP |
Why is 2048 × 2048 px the practical working size for most stores? It’s the square size Shopify says usually displays best, and it leaves plenty of headroom under the 5000 × 5000 px ceiling and the 20 MB file size limit.
A sharp image at this size also gives Shopify strong material to create its smaller versions from.
Shopify will create smaller versions for different parts of your theme automatically, but the uploaded master should already be clean, sharp, and correctly framed. If your source file is blurry or poorly cropped, no amount of automatic resizing will fix it.
Choose one aspect ratio—often 1:1—for the first image on each product so that grids, related-product carousels, and collection pages all align neatly. This single decision eliminates most layout headaches before they start.
How Shopify Handles Image Resizing Behind the Scenes

When you upload a Shopify image, the platform automatically creates smaller copies for different parts of your theme, such as grid tiles on collection pages and larger views on the product page. This means merchants don’t have to manually export every size.
However, you do need to start from one strong master image that respects the 5000 × 5000 px and 20 MB limits. Shopify itself explains that images displayed side by side can appear at different sizes, and that using a consistent aspect ratio for main images keeps them the same size.
This behavior is separate from compression or advanced editing. Pre-upload optimization is still valuable and is covered in more detail in the dedicated product photo editing workflow article. That guide walks through exposure, color correction, and batch processing—topics that go beyond pure dimensions but directly affect how professional your shopify store feels.
After uploading, preview your products and collections on both desktop and mobile to confirm that the theme is using the resized versions as expected. Shopify’s resizing system works from your uploaded file, so a clean, correctly framed source gives it good material to work with.
Shopify Collection Image Size and Consistent Aspect Ratios
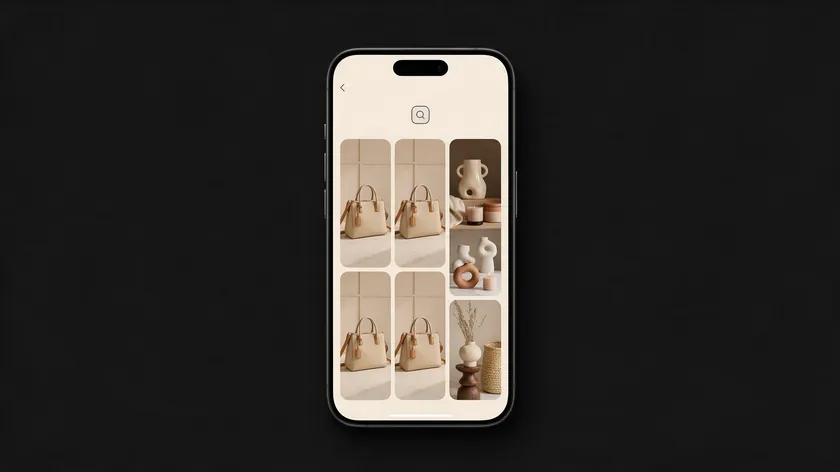
A Shopify collection image is the cover photo for a product group—think “New In,” “Summer Dresses,” or “Bestsellers.” Shopify applies the same 5000 × 5000 px and 20 MB limits to collection images as it does to product photos.
For simplicity, the same 2048 × 2048 px square also works well as a working size for collection covers.
The most common problem with collection pages is that side-by-side images appear at different heights when their aspect ratios don’t match. Even if two photos have similar pixel counts, one portrait shot next to a square creates an uneven row that makes the entire page look unfinished.
| Issue | What To Do |
|---|
| Tall portrait shots mixed with square product images | Crop all main images to the same ratio (e.g., 1:1) before upload |
| Collection cover photos at a different ratio than product images | Match collection covers to your product image ratio |
| Products appearing different sizes despite identical pixel counts | Standardize framing so products fill a similar percentage of the canvas |
Match the aspect ratio of collection cover photos to your main product images—for example, all squares—so the entire catalog, from grids to collection tiles, feels unified. According to Shopify, themes can request consistent sizing for images saved in different ratios, but starting from one correct aspect ratio gives every theme the most predictable result.
Why Consistent Shopify Image Dimensions Matter
While Shopify image dimensions are flexible up to the 5000 × 5000 px limit, inconsistent shapes are what most often make a catalog look messy. The pixel count matters less than the ratio.
Inconsistent aspect ratios across your main images tend to cause a few visible problems in your store, including:
- Uneven product grids where some rows are taller than others
- Customers struggling to compare sizes or styles quickly because items aren’t visually aligned
- A less polished first impression that undermines trust
Shopify itself notes how images side by side on collection pages can appear inconsistent, and that a shared aspect ratio for main images keeps them the same size. Consistent aspect ratios help ensure alignment in product grids across devices—from wide desktop monitors down to narrow phone screens.
Using the same canvas—for example, always exporting to a 2048 × 2048 px square—also makes lifestyle images or detail shots easier to line up visually. Square product images make grid alignment simple, and they streamline your workflow because every export follows the same template.
This matters especially for stores with many SKUs because even tiny inconsistencies compound across dozens or hundreds of products. A five-product store can get away with manual adjustments; a five-hundred-product store cannot.
Best File Types for Shopify Product Images
Choosing the right file format is almost as important as choosing the right image size. According to Shopify, PNG is the best image file type for most product images, with JPEG as a strong second choice. Other image formats are supported but more situational.
| Image File Type | Typical Use | What Shopify Says | Notes For Sellers |
|---|
| PNG | Detailed edges, graphics, transparent background | Best for most product images | Larger files; uses lossless compression; ideal for graphics and logos requiring transparency |
| JPEG | Standard product photography | Strong alternative to PNG | Commonly used for photographs due to its balance of size and quality; preferred for photographic images with rich colors |
| WebP | Modern image format for web delivery | Accepted; Shopify serves the best format each customer’s browser supports | Modern format with strong compression efficiency; animated WebP is also supported |
| Other (TIFF, BMP, GIF, SVG, HEIC) | Specialized cases | Accepted | SVG files scale to any size without losing quality as a vector image format; JPEG or PNG are the safer defaults for product photos |
When to use PNG: product shots with clean, detailed edges or graphic elements where you need crisp lines. PNG format supports transparency and uses lossless compression, which means no image quality loss during saving. PNG files work well when you need a transparent background for your shopify product image.
When JPEG may be preferable: simple photographic scenes where a smaller file size matters and slight compression artifacts aren’t visible. JPEG format is preferred for standard product photography with rich colors, and it keeps file sizes manageable for large catalogs.
You can upload WebP, but you don’t need to convert your files yourself: Shopify’s image service picks the best format each customer’s browser supports. For most stores, uploading a clean PNG or JPEG master is the simplest approach.
Other marketplaces handle file types and sizes differently. The Etsy and Amazon size guides, linked below in the cross-platform section, cover their platform-specific rules, so those details aren’t repeated here.
Preparing Product-Only Photos vs. Lifestyle Images
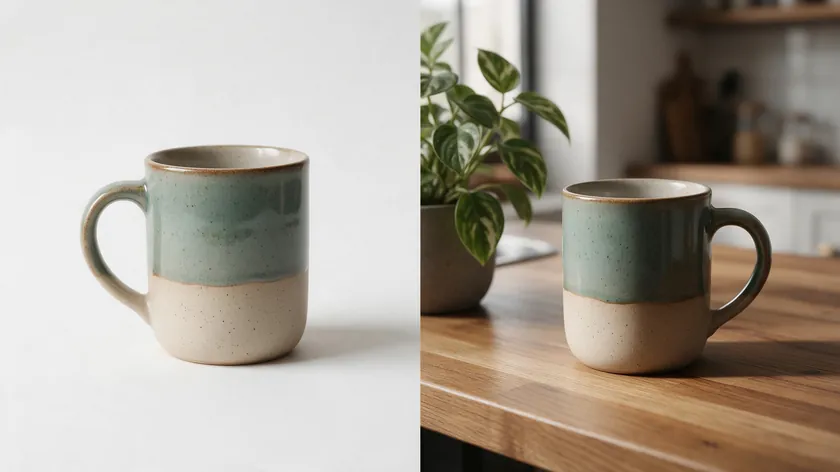
There’s a meaningful difference between clean product-only images—usually with simple or white backgrounds—and lifestyle images showing products in real-world scenes. Both image types must respect the same Shopify image dimensions and file size caps, and ideally share the same aspect ratio to keep grids tidy.
Pure white background recommendations, along with comparisons to marketplace background rules, are already covered in the white background rules and setup guide—that’s the place to go for detailed direction on background colors and standards.
Use product-only images as the first (featured) image in each listing for clarity and consistency. Lifestyle images work best as supporting photos—second, third, or fourth slots—where they add context, show scale, and tell a story without disrupting the uniformity of your grid.
Background removal on complex images like glass, jewelry, or fabric requires more detail than this sizing guide covers. That topic is handled in the background removal for hard subjects article.
How Photography Choices Affect Perceived Image Size
Shots with different framing, angles, or crops can make products feel larger or smaller on the page—even when the underlying Shopify image dimensions are identical. A tightly framed product dominates the available square, while very loose framing leaves lots of empty space and makes items look tiny in the grid.
Guidance on lighting, angles, and camera settings is covered in the ecommerce product photography guide and the guide on taking product photos with a phone. This article stays focused on sizing and prep.
Review several product pages in a row and compare how much of each square image is filled by the item itself. If one product fills 90% of the frame and another fills 50%, they’ll look mismatched even with identical pixel counts. Adjust crops to achieve comparable visual presence across related items.
Use the same relative crop—similar headroom and side margins—on products within the same collection. When framing is consistent, differences in product size or design become instantly obvious to shoppers, which is the whole point.
How to Prepare a Photo for Shopify With RemoveBackground.app
This section walks through a practical workflow for cleaning and standardizing your images before applying the shopify picture size you’ve chosen. The goal is a repeatable process that keeps your catalog looking uniform from the first product to the hundredth.
- Go to the homepage tool at RemoveBackground.app. The editor loads directly in your browser—no downloads needed.
- Upload your product photo. Select the image from your files.
- Let the automatic background removal run. The tool detects your product and strips the background in seconds.
- Open the Background tab. Choose from Photo, Color, or Blur options. Select Color and pick a solid shade—white or off-white is the most common choice for Shopify product images.
- Refine edges with the Actions tab. Use the Erase and Restore tools with the Brush size control to tidy any rough spots around your product’s outline.
- Click Download when the image looks clean and ready.
- Resize to your standard dimensions. After downloading, open the cleaned image in your preferred editor and crop or resize it to a square—for example, 2048 × 2048 px—before uploading to your Shopify store.
Repeat this same process for each main image to ensure consistent framing, background style, and aspect ratio across the entire catalog. This kind of streamlined workflow is far faster than trying to fix incorrect image sizing one by one inside Shopify after upload.
Workflow Tips for Editing and Optimizing Shopify Images
Editing and image optimization go beyond pure dimensions—they cover exposure, color, contrast, and subtle retouching. Full workflows for those topics are covered in the product photo editing article linked earlier, so this section stays focused on the sizing and export side.
Here is a practical sequence you can follow for each product photo before it goes into your store:
- Start with the highest-quality original you have—ideally a high resolution image straight from the camera
- Remove or simplify the background using your preferred tool
- Crop to your chosen aspect ratio (e.g., 1:1 square)
- Export within Shopify’s pixel and megabyte limits (2048 × 2048 px, under 20 MB)
Images need to be under 20 MB to be added to Shopify, and very large files take longer to upload and edit. Compressing your images before uploading keeps files manageable, as long as they stay sharp. Descriptive file names also make your library easier to manage—name files something like “blue-ceramic-mug-front.png” instead of “IMG_4823.png.”
Batch-editing tools are especially helpful when converting an entire catalog to a new standard size like 2048 × 2048 px so that grids and collections remain uniform. Image optimization isn’t just about shrinking file sizes—it also includes consistent color, white balance, and contrast, all of which affect how professional a shopify store feels.
When your editing choices are consistent, your catalog looks more cohesive and professional. That consistency compounds as your store grows.
Fixing Blurry and Oversized Images Before Upload
Blurry images and oversized images are two separate problems. Blurry images usually start with a low image resolution or a poorly focused source file, so check the original before you resize it. High resolution images and high quality images give Shopify the best starting point.
Oversized images, meaning files above 5000 × 5000 px, 25 megapixels, or 20 MB, should be resized before upload. A simple image optimization routine of resizing, cropping, and then compressing keeps every file sharp while you avoid losing quality along the way.
Many merchants reuse the same photos on Shopify and on marketplaces like Amazon or Etsy, each with its own image size guidelines. A photo that works perfectly on Shopify may need different dimensions or a different file format for another platform.
This article sticks to Shopify’s official limits, but separate guides exist for Amazon product image size and Etsy listing photo size. Consult those for platform-specific requirements rather than trying to memorize every marketplace’s rules at once.
Maintain a high-resolution master file for each product—ideally at or above 2048 × 2048 px—and then export platform-specific versions as needed. Using one consistent aspect ratio across platforms where possible simplifies cropping and keeps your brand images recognizable everywhere.
Shopify’s generous maximums (5000 × 5000 px) mean your Shopify image can safely be derived from the largest master file you maintain. Keep that master archived offline for print or future platform needs.
Website Image Size Guidelines vs. Shopify’s Limits
General website image size guidelines cover hero images, banner images, background images, blog images, and more—a broader scope than this article’s focus on shopify product images and collection photos.
Shopify’s 5000 × 5000 px limit is a ceiling, not a target. Product and collection photos rarely need to approach it, and a 2048 × 2048 px square is the size Shopify says usually displays best.
Hero images, banner images, slideshow images, static images, and background images can follow their own sizing rules, and so can blog images and featured blog images. Shopify blog image size and Shopify background image size depend on your theme, so check your theme’s documentation rather than assuming the catalog numbers apply.
Your priority as a merchant should be a consistent, square canvas for catalog images, and resizing to 2048 × 2048 px before upload matches the size Shopify says usually displays best.
A stable internal standard for product images simplifies the rest of the image sizing decisions across the site. Once your catalog images are locked in, everything else—from static images on landing pages to background images—becomes easier to manage.
Common Shopify Image Mistakes
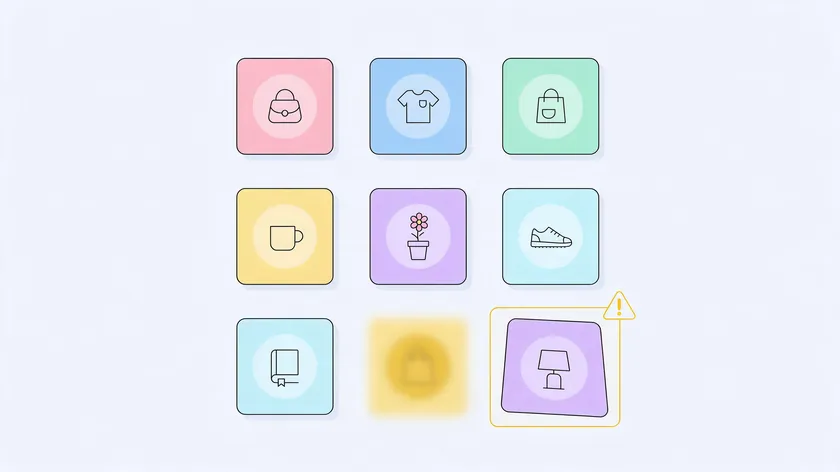
Here are the most frequent Shopify image sizing mistakes, what they look like in your store, and how to fix each one.
| Mistake | Result In Your Store | Fix |
|---|
| Mixing landscape and portrait main photos in one collection | Uneven rows, jagged grids, products appearing mismatched | Crop all main images to the same aspect ratio (e.g., 2048 × 2048 px square) |
| Uploading files close to the 20 MB limit with no optimization | Slow-loading pages and heavy files that take longer to upload | Compress images before upload and keep every file well under the 20 MB limit |
| Using different background colors or tones for similar products | Catalog looks inconsistent; products feel like they belong to different stores | Standardize background color using a tool like RemoveBackground.app |
| Ignoring aspect ratio and only thinking in raw pixel numbers | Correctly sized images in pixels but still misaligned in the grid because shapes differ | Lock in one ratio (1:1 is safest) and apply it to every featured image |
| Uploading oversized images beyond 5000 × 5000 px | Upload failure or rejection; wasted time and storage | Resize to recommended dimensions before upload |
Blurry images often trace back to a source file that was too small or poorly focused—not to Shopify’s processing. If your image resolution is low in the original, no platform can fix that.
Solving these few mistakes usually delivers an immediate, visible improvement in how polished and professional the entire shopify store feels. You can often fix your highest-traffic collection pages in a single afternoon.
Putting It All Together: A Simple Catalog Sizing Plan

The goal is to turn all of these guidelines into one repeatable plan any Shopify seller can implement over a weekend. Here’s a concise checklist:
- Pick one aspect ratio. Square (1:1) is the most straightforward choice for uniform image dimensions across grids and collections.
- Choose a working size. 2048 × 2048 px for both product and collection images. This is the square size Shopify says usually displays best.
- Decide on your primary file format. PNG for products needing crisp edges or transparency; JPEG for simpler photographic images where file size matters more.
- Set a standard background style. White, off-white, or transparent—pick one and stick with it across every main image.
- Process in batches. Tackle products by collection or category to keep work manageable and avoid half-updated sections of your site.
Document your internal standard—the exact shopify image dimensions, the shopify image format, the background color code—and share it with anyone who shoots or edits photos for your store. When a new photographer or designer follows the same spec sheet, their images match on the first try.
For complex background removal or detailed editing questions, the linked guides earlier in this article cover those topics. This plan focuses on consistent sizing and structure—the foundation everything else builds on.
Wrap-Up
Shopify product images and collection images share the same technical limits: up to 5000 × 5000 px, under 20 MB, with 2048 × 2048 px as the size Shopify itself says usually displays best.
Correctly sized images at a consistent aspect ratio are the most powerful tool for keeping a Shopify catalog clean, whether a store has 20 SKUs or 2,000.
Choosing the right image type—usually PNG or JPEG—and preparing each photo properly avoids most display issues without needing complex theme tweaks. Optimized images also help pages load faster.
Review a handful of live product and collection pages after making changes so you can see the impact of better sizing right away. Even fixing your top five collections will make a noticeable difference.
Below you’ll find a quick-reference summary of the key points, followed by answers to the most common questions merchants ask about Shopify image sizes.
Key Takeaways
- Upload images up to 5000 × 5000 px, but standardize around 2048 × 2048 px squares—the size Shopify says usually displays best.
- Keep product and collection cover images on the same aspect ratio (1:1 square is safest) to ensure uniform grids on both mobile and desktop.
- Prefer PNG or JPEG as your primary Shopify image formats; Shopify names PNG as the best image file type for most product photos.
- Rely on Shopify’s automatic resizing for the smaller versions your theme needs, but always start from a clean, optimized master file within the 20 MB limit.
- Use a consistent workflow—such as RemoveBackground.app plus a crop to your standard dimensions—to maintain catalog uniformity.
- Document your internal standard for shopify image sizes so every future photo from any source matches on the first upload.
Ready to clean up your next batch of product photos? Head to RemoveBackground.app to remove backgrounds, choose a solid color, refine edges, and download images that are ready to resize and upload to your Shopify store.
FAQ
These questions cover recurring concerns about Shopify image dimensions, file formats, and catalog consistency. Answers rely on official Shopify statements where available.
What size should Shopify product images be?
Shopify allows product images up to 5000 × 5000 px (25 megapixels) under 20 MB, but its own help docs say that 2048 × 2048 px square images “usually display best” for products. The most important thing is choosing one consistent aspect ratio—1:1 squares being the most straightforward—so your entire catalog looks aligned.
Merchants can safely go smaller or larger within those maximums as long as all products share the same shape and remain sharp. Some themes offer zoom functionality on product pages, but Shopify’s product media page does not state a mandatory minimum dimension for it, so sellers should focus more on clarity and consistency than on chasing a specific threshold.
Test a few products at your chosen size on different devices to confirm that text, textures, and fine details remain legible.
Does Shopify resize or compress my images?
Shopify creates smaller versions of each uploaded image and uses them in different parts of your theme. This means you don’t need to manually create every size yourself.
However, you should not rely on this process to fix low-quality or poorly cropped uploads. Shopify may also adjust file formats behind the scenes—for example, serving a WebP version to browsers that support it—but the original master image remains the reference for image quality.
Always upload well-prepared files within the 5000 × 5000 px and 20 MB constraints so automatic resizing works from a strong starting point. If images still look soft or distorted after upload, the issue is often the source file and not Shopify’s optimization.
Are PNG or JPEG better for Shopify?
Shopify names PNG as the best image type for most product photos, particularly when crisp edges, graphic elements, or transparency matter. PNG is ideal for graphics and logos requiring transparency, and its lossless compression means no image quality loss on save.
JPEG is still a strong choice for simpler photographic scenes—it’s commonly used for photographs due to its balance of size and quality, and it keeps file sizes smaller when slight compression is acceptable.
WebP is also worth knowing about: you can upload it, and Shopify serves the best format each customer’s browser supports even if you uploaded a PNG or JPEG original.
You can mix PNG and JPEG across a catalog, but using one primary format for product-only shots simplifies your workflow and keeps your export process consistent.
How do I keep my collection images the same size?
The most reliable method is to decide on one aspect ratio—usually 1:1—and export both product images and collection cover photos at that same shape. Choose a standard working dimension such as 2048 × 2048 px so all visible tiles share both shape and image resolution.
Use a repeatable workflow: clean the image with RemoveBackground.app, crop to a square, and then export every main digital image at identical dimensions. Once uploads are consistent, Shopify’s automatic resizing will maintain that proportionality across grid layouts and collection pages.
If your store already has inconsistencies, fix the most visited collections first—like “Bestsellers” or “New Arrivals”-to maximize impact with limited editing time.
What happens if my image is bigger than 5000 × 5000 px?
Shopify’s documented limit for product and collection images is 5000 × 5000 px and 25 megapixels, with a file size under 20 MB. Oversized images that exceed these limits may fail to upload or be rejected entirely.
Even a very large file would offer little real-world benefit, since Shopify creates smaller display versions for different parts of your theme.
Resize oversize source files down to a practical working size—like 2048 × 2048 px—before upload. This pre-upload step also speeds up local editing and makes it easier to optimize images across your catalog without losing quality.
Keep a larger offline master for archival or print needs, but always use Shopify-appropriate exports for the online store. Your product and collection image exports should both stay comfortably within the platform’s limits.