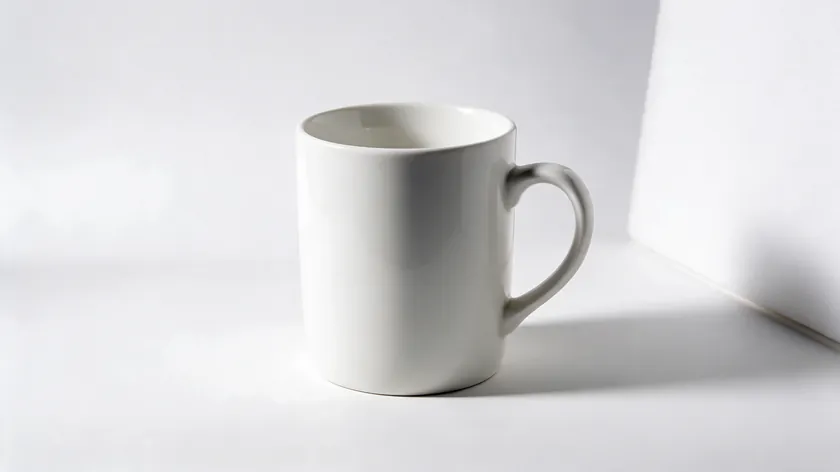
Professional product photography relies heavily on lighting. The way you light a product determines how edges, textures, and colors appear in the final image.
Poor lighting creates harsh shadows, halos around edges, and uneven color across your product shots, all of which make it harder to cut the product out cleanly for a white background or transparent background.
This lighting guide is built for online sellers and small brands who shoot tabletop and small-set products at home or in a small studio.
The goal: repeatable lighting setups for different materials, using mainly continuous light and simple light modifiers.
No advanced math, no complicated studio rigs, just practical steps and visual descriptions of how each setup should look so you can produce consistent results across dozens of SKUs.
Table of Contents
Natural Light vs. Artificial Light: Choosing the Best Light for Consistent Results
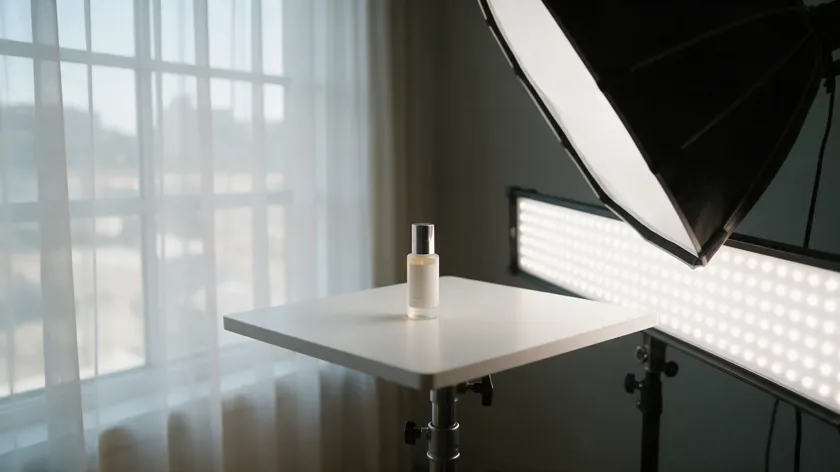
Natural light is emitted by the sun and enters your shooting space through windows, bouncing off walls and surfaces. On a cloudy day, a large window provides soft and diffused lighting that works for lifestyle shots and casual product images.
Diffused window light is a cost-effective light source for beginners. The problem is consistency: natural light is unpredictable and varies throughout the day.
Its color temperature shifts from warm and golden at sunrise and sunset to cooler and bluer around midday. Cloud cover, season, and time all change the intensity and direction of the light coming through your space.
For a single product photo, that variation might not matter. For a catalog of 50 items that all need to match, it creates visible mismatches in shadows, contrast, and product color from shot to shot.
Artificial light solves this. Continuous LED lighting is a common choice for product photography because it provides complete control over intensity and direction.
Modern LED panels or COB lights output a stable color temperature (typically 5,000 to 5,600 K), adjustable brightness, and the same look whether you shoot in January or July, at 8 a.m. or 10 p.m.
LED lights allow real-time visibility of lighting effects on products, so you can see exactly what the camera will capture before pressing the shutter.
Natural light can still work for small lifestyle shots, but it is risky when you need a repeatable “catalog look” and images that cut out quickly.
If you are working with a single window and a phone, the How to Take Product Photos With Phone guide covers that workflow.
For the dedicated product photography lighting setup this article describes, continuous light with modifiers is usually the best light source for small brands working toward clean, predictable e-commerce images.
Core Concepts: How Light Direction and Quality Affect Cut-Out-Friendly Photos
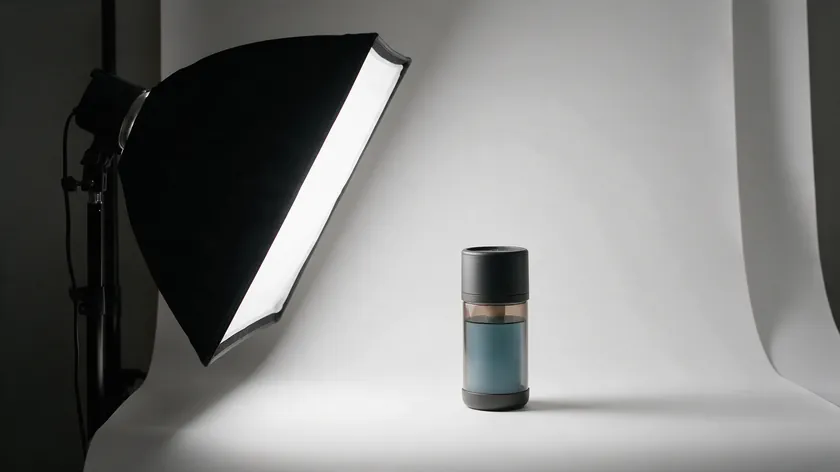
Before choosing gear, understand how the direction and softness of your main light alter edges, shadows, and reflections on the product.
A key light is the main light source positioned at an angle to the product. It is your primary light source, the dominant light shaping the product’s form.
Its position controls where the strongest shadow will fall. Place the key light directly in front and shadows disappear, flattening shape.
Place it to the side and slightly above, and you get soft shadows that reveal contour and depth.
Soft light comes from a large, close light source (like a large softbox or diffusion panel placed near the product).
It produces gentle gradient shadows and a more refined appearance, reducing harsh shadows. Place a softbox close to the product for softer shadows that blend into the background rather than creating hard edges.
Hard light, by contrast, comes from small or distant sources and produces sharp, crisp-edged shadows that can create halos or artifacts when you try to cut the product out. Side lighting emphasizes surface texture and product contours, which helps define the shape.
One common mistake: placing the light too close to the background. When light falls on the backdrop behind the product, it creates bright gradients and hot spots that make background removal harder.
Keep the background a clear step behind the product (at least 1 ft / 30 cm, ideally more) to maintain separation.
A starting position that works for most small products: position lights at 45 degrees to the side, slightly above the product’s midpoint, for even illumination and clean edge definition.
Essential Gear for a Small Product Photography Lighting Setup
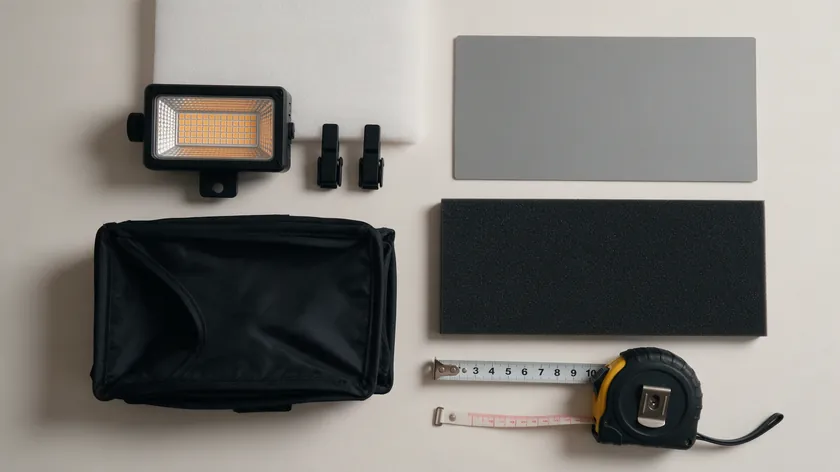
This section covers practical gear that fits on a dining table or small shooting bench. No complex studio systems required.
Light Sources
Two to three continuous LED panels or COB lights with adjustable brightness and a color temperature around 5,000 to 5,600 K give you neutral, daylight-balanced illumination.
Look for a high CRI (Color Rendering Index) for accurate color reproduction, especially for products where color fidelity matters: clothing, cosmetics, food packaging. Continuous LED lights provide real-time lighting effects, so you adjust as you go.
Many panels accept a Bowens mount, which lets you attach various modifiers. Using the right lighting equipment improves overall product presentation. A sturdy light stand is essential for stability and height adjustment; flimsy stands drift and change your shadows mid-session.
Light Modifiers
Effective ways to diffuse light include softboxes and diffusion panels. A softbox creates soft, diffused light for product photography by enlarging the apparent size of the light source.
Rectangular softboxes work well as a primary modifier; strip softboxes serve as accent or rim lights.
Shoot through umbrellas are another versatile option for softening a bare LED, though they offer less spill control than softboxes. A 5-in-1 reflector helps fill shadows without adding extra lights.
DIY Fill and Flags
White foam board placed on the opposite side of the key light bounces light back into shadow areas. Black cardboard absorbs stray light and prevents unwanted bounce, acting as negative fill to preserve contour.
Translucent fabric, baking paper, or sheer curtains stretched over a frame work as emergency diffusers to soften a bare bulb. These materials cost a few dollars and do real work in controlling light quality.
Stands and Clamps
Light stands with adjustable height and secure clamps let the lighting setup for product photography stay identical across multiple items and shooting days. Mark positions on the floor with tape so you can rebuild the setup after moving it.
For a minimal single-light starter kit, the Ecommerce Product Photography guide walks through that simpler approach.
Building a Base Lighting Setup for Tabletop Product Photography
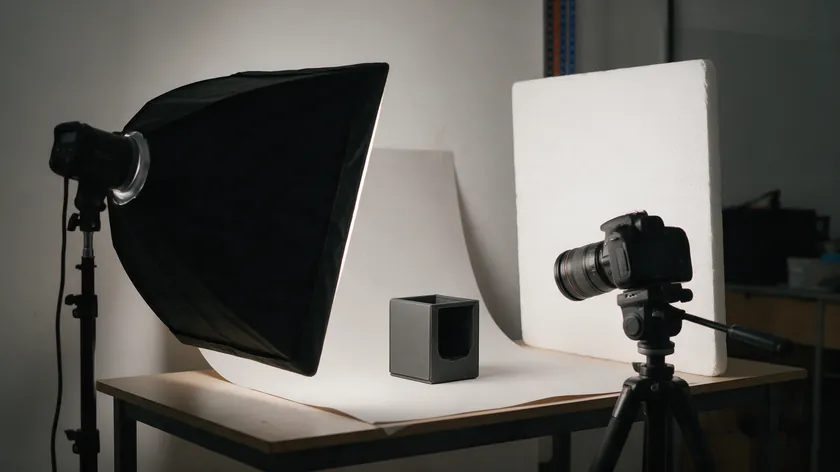
This section gives a repeatable starting point for most products: a neutral, well-controlled two-light setup aimed at easy cut-outs.
Layout
Place the product on a matte, non-reflective surface. Set a paper sweep or board background a short distance behind (1 to 2 ft / 30 to 60 cm). Center the camera on a tripod at the product’s eye level.
Main Light
Position a large softbox or LED panel about 45 degrees to the left, slightly above the product, angled downward.
This creates soft shadows on the right side that reveal form without harsh edges.
Avoid pointing the light at the background; that creates hot spots and gradient spills behind the product.
Fill
Place white cards outside the frame on the opposite side to fill shadows. A white foam board or white reflector opposite the main light is a simple fill to tame deep shadows without flattening the image.
Position a fill light opposite the key light to reduce shadows; if you have a second continuous light, run it at lower power than the key.
A two-light setup is ideal for product photography because it gives you more control over the balance between highlight and shadow.
Light Height and Distance
Adjust light height and distance to prevent hard “ground” shadows. If the main light is too low, strong shadows stretch behind the product and merge with the background, making selection harder.
Raise it until the shadow tucks neatly under or just behind the product.
If a stubborn shadow remains after adjusting your lights, the How to Remove Shadow from Picture guide covers editing options.
This base arrangement handles most small products and gives you clean separation. The Ecommerce Product Photography guide covers single-light basics, and the White Background for Selling Items guide details the white-background exposure workflow.
Tuning Light by Surface Type: Matte, Semi-Gloss, and Shiny Products
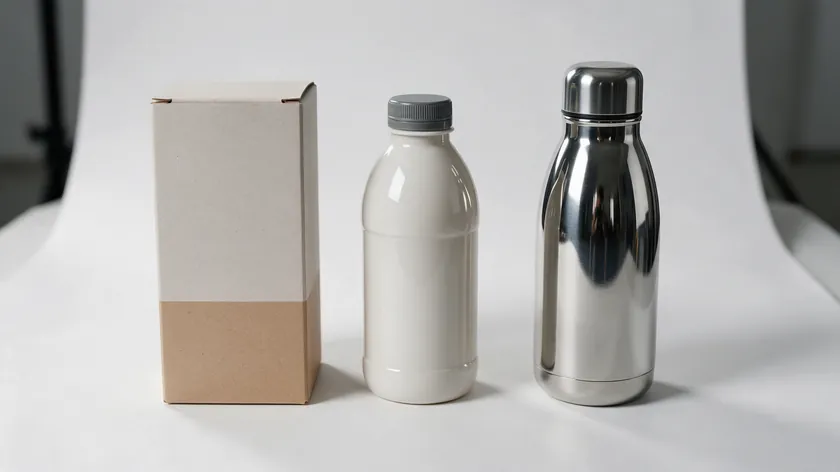
Material and finish shape how photography lighting behaves. A single lighting setup rarely works for every surface.
Matte Surfaces
Matte materials (cardboard boxes, fabric pouches, uncoated paper, powder-coated metal) reflect light diffusely. They show texture well, so slightly harder side light from a smaller modifier reveals shape and weave.
Keep the fill light controlled so edges remain crisp; too much soft light flattens texture and reduces detail.
The goal here is controlled shadows that define the product’s contour without creating strong shadows that bleed into the background. A moderate amount of overall contrast helps these products pop.
Semi-Gloss Plastics and Coated Packaging
Semi-gloss surfaces reflect partly specular and partly diffuse. They risk showing specular highlights as harsh streaks if the light source is too small or angled incorrectly.
Use a larger, softer main light (a large softbox, for instance) and angle it so the reflection on the product surface appears as a clean, gradual band rather than a chaotic glare.
This flattering illumination shapes the product without breaking the outline with bright streaks.
Very Shiny Products
Reflective products require careful lighting to avoid unwanted reflections. For highly reflective surface items (chrome, polished metal, glossy coatings), move lights further to the side and slightly behind the product.
The product’s surface becomes a mirror; what it reflects is what you see in the photo. Use black cards to absorb stray highlights and keep unwanted shapes (your camera, your hands, the room) off the finish.
Rotate the product to control reflections and find the angle where the light modifier produces a clean, defined highlight band. Use a black card to absorb reflections behind glossy items. For jewelry lighting specifically, the How to Photograph Jewelry guide covers those specialized techniques.
The goal across all surfaces is not to eliminate reflections but to shape them into clean, consistent bands that help show form without confusing automatic background removal.
Lighting Dark, Mid-Tone, and White Products for Clean Separation
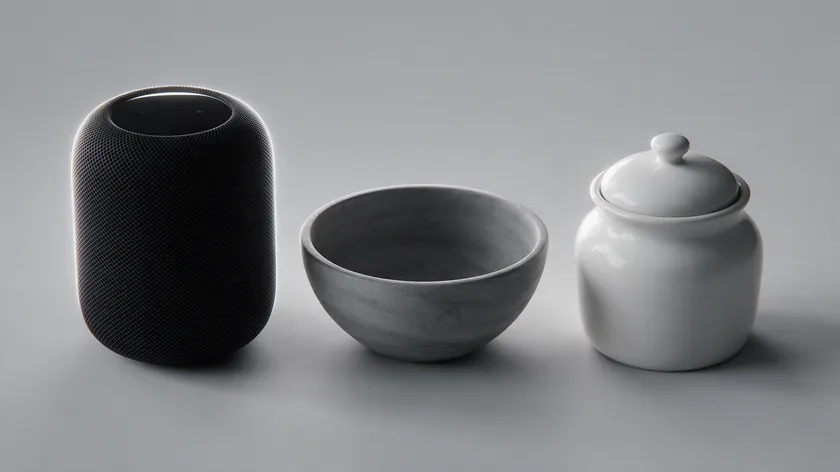
The brightness of the product itself affects whether it sinks into or pops out from the background, particularly on light backdrops.
Dark Products on Light Backgrounds
Dark objects (black electronics, navy fabric, deep brown leather) can lose their edges against a bright backdrop. Increase the key light intensity so the product’s surface picks up enough detail to separate from the background.
Use gentle fill from the front to lift shadow areas. A subtle rim light from behind outlines the dark edge with a thin bright line, preventing it from blending.
Low-key lighting uses darker backgrounds and controlled highlights, but when you need a white background, rim light is your edge-definition tool. This is where a three-point lighting setup enhances depth and dimension: key, fill, and rim working together to show more detail.
Mid-Tone Products
Mid-tone items (grays, muted colors, natural wood, matte plastics) are the most forgiving.
Focus on keeping the main light relatively soft and to the side, avoiding strong background gradients.
Keep contrast moderate and ensure even illumination across the product and backdrop. A simple two-light setup handles most mid-tone products without additional accent lights.
White or Pale Products on White Backgrounds
This is the hardest scenario. High-key lighting creates bright images with minimal shadows, but if you push exposure too far, you lose the edge where the white product meets the white background.
Reduce overall light contrast. Light the background separately at a level just above the product’s edge brightness, not so bright that it bleeds around the product.
Add careful side light to carve a faint outline. For marketplace white-background rules, the White Background for Selling Items guide covers the specifics.
Watch the histogram on your camera. Avoid blowing out the brightest parts of the product; clipped whites erase edge detail and complicate precise cut-outs. Keep some headroom in the highlights so the product edge stays defined.
Controlling Background Light So Products Separate Cleanly
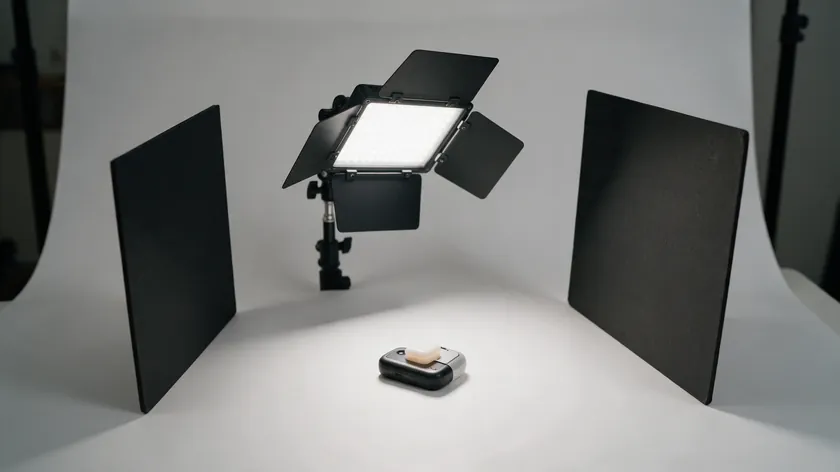
Background light must be treated as a separate element from product light. When both share the same source, you lose precise control over halos, flares, and messy gradients behind the subject.
Use a dedicated background light source (or two small sources) aimed only at the backdrop. Attach barn doors or position flags to prevent spill onto the product.
The background should be just slightly brighter than the product edges when you plan to replace it with pure white or transparent, but not so bright that it glows around the subject and washes out contours.
Keep this to separation and halo control; for the exposure workflow to blow out a white background, see the White Background for Selling Items guide.
A simple test: turn off the product lights and look at the background illumination alone. Check for evenness.
Then turn the main light and fill back on, adjusting their intensity relative to the background until edges are distinct.
Place black foam boards near the product sides to tighten the edge and stop background light from wrapping around.
Professional results in product photography come from controlling light and shadows at this level of detail.
Use bounce light from white cards only where needed; use black cardboard to absorb where you need separation.
When the background is separated cleanly, RemoveBackground.app can handle the final cut-out quickly.
Using Rim Light and Accent Light to Define Edges
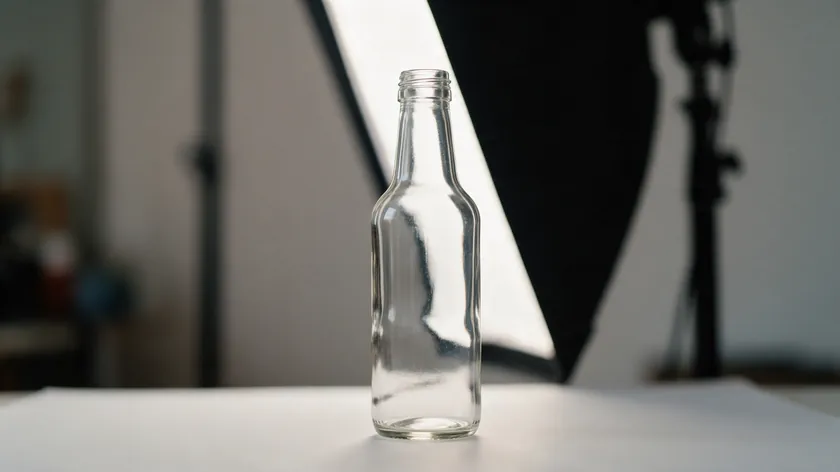
Rim light is a narrow, controlled light from behind or the side that adds a thin highlight line along the product edge. It acts as a visual separator, making the product outline pop against any background.
Place a rim light behind the product, slightly off to one side, raised higher than the product, and aimed so it just grazes the edge without spilling across the front.
Use small, focused modifiers like strip softboxes or snoots, and add flags to prevent the rim light from contaminating the background with bright streaks.
Backlight creates separation from the background and highlights product edges, which is why rim light matters for cut-out workflows. Backlighting enhances transparency for products like glass and beverages.
Rim light is most useful for dark or mid-tone items on mid-tone backgrounds, or for separating curved surfaces (bottles, tools, rounded electronics) from similar-colored scenes.
Keep the rim light at lower power than the key light; if the rim equals or exceeds the key, the front surface appears flat and the accent overwhelms the product’s natural shape.
Three-point lighting is a versatile setup for product photography: key light for form, fill light for shadow control, and rim light for edge definition. This combination of lighting techniques gives you product images with clean edges that are ready for removal.
Practical Lighting Setups for Common Product Categories
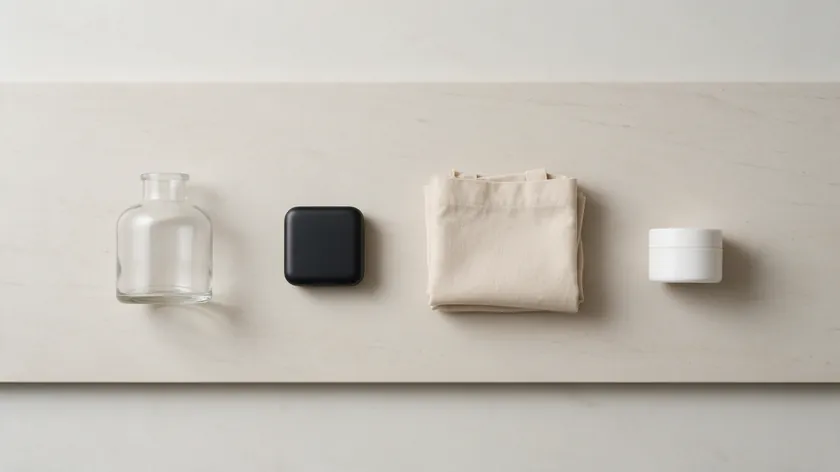
Here are concrete setups for typical items shot on a tabletop. Each applies the principles above as a complete example.
Bottles and Transparent Containers
Use a soft, diffused side light as the key, with backlighting behind the backdrop to enhance the transparency of glass and liquid.
Add a thin rim light from behind one side to define the glass edge without flare.
This setup benefits from a translucent backdrop that lets background light pass through, creating clean illumination inside the container.
Electronics and Glossy Gadgets
Position the main light as a large softbox at a low angle (about 30 to 45 degrees) so reflections trace the shape of the device.
Place black cards near the edges to create controlled reflection bands. Soften shadows with a white reflector on the fill side. This prevents chaotic reflections that confuse masking.
Fabrics, Apparel Accessories, and Soft Goods
Use a slightly angled side light and minimal fill to reveal weave and folds.
The light quality here matters: soft enough to avoid harsh shadows across wrinkles, but directional enough to show texture.
Keep the background light bright and even so folds don’t create confusing dark pockets near the edges.
Small White Appliances or Cosmetic Jars
Use a gentle overhead main light through a large softbox plus a separate background light at moderate power.
Add subtle side fill so the white product does not blend into the white backdrop.
This is where a single light can work for minimalist product photography setups, but the two-light approach gives much better separation.
Use the reference table in the next section as a quick checklist for new products.
Reference Table: Example Product Photography Lighting Setups
| Product Type | Main Light & Modifier | Fill / Rim Light | Background Light Strategy |
|---|
| Matte box packaging | LED panel with rectangular softbox at 45°, slightly above | White reflector on opposite side; no strong rim needed | Background light diffused; backdrop 1–2 ft (30–60 cm) behind product |
| Glossy electronics | Large softbox at low angle to control reflections | Black flags near edges; subtle rim behind for silhouette | Barn doors on background light; keep even, no hot spots |
| Clear bottles | Soft side light + overhead diffuser | Rim light behind one side to highlight glass edge | Backlit translucent backdrop; no front spill |
| Dark fabric items | Slightly harder side light for texture | Moderate fill; rim light for edge separation | Background light raised to prevent dark gradient behind folds |
| White plastic products | Gentle overhead softbox; side fill | Very soft rim to outline edges; avoid bright specular spots | Backdrop lit separately at just above product edge brightness |
Each row targets a different lighting outcome: strong edge definition for glass, subtle texture emphasis for fabrics, or maximum separation for white-on-white.
Treat this table as a starting checklist when building a product photography lighting setup for new SKUs.
Colored lighting can enhance visual interest in product photography for creative shots, but for catalog work, stick to neutral daylight-balanced sources.
For before-and-after results showing these setups in action, the Product Photography Examples guide covers specific outcomes.
Keeping Your Lighting Consistent Across Sessions
Consistent results across days and product batches depend on repeatable studio lighting, not on guessing each time you shoot.
Mark light stand positions on the floor with tape and measure the light-to-product distance so setups can be rebuilt after breaks or location changes.
Log key parameters: light heights, approximate angles, power levels, and any special use of rim light or flags for each product category.
This turns perfect lighting from a one-time achievement into a repeatable process.
Shoot a quick reference card or gray card at the start of each session to keep color and exposure uniform across many images.
If your ambient environment changes (a window you forgot to cover, an overhead room light left on), those small shifts in illumination create headaches during batch background removal.
Block windows if natural light will change. Keep walls neutral, or place white or black foam boards to shield the set from unwanted bounce.
Small variations in background light or main light angle can cause visible mismatches across a batch. Careful notes save hours of editing later.
When you shoot an entire product category back-to-back without altering the setup, every image quality metric stays uniform.
Controlled, consistent light is upstream of every editing step. When you get the lighting right at capture, background removal becomes predictable, edges stay clean, and your product images look like they belong together across your entire catalog. Good lighting is what makes every later step easier.
Key Takeaways
- Controlled artificial light, especially continuous LEDs with modifiers, tends to give the most consistent results and the easiest background separation for product photography.
- The best lighting setup changes with product surface: matte fabric, glossy plastic, glass, and white products all benefit from different light angles, contrast levels, and modifier choices.
- Every product photography lighting setup in this guide aims for a clean subject with soft, controlled shadows and a background that is simple to remove or turn pure white.
- You can build an effective tabletop photography lighting setup at home with two to three lights, simple light modifiers, and foam boards instead of a full studio. Studio lighting does not require a studio.
- Lighting choices, not editing, are what make background removal fast and predictable: get the light right, then use RemoveBackground.app for the final clean cut-out.
Ready to see how clean your lighting really is? Upload your product photos to RemoveBackground.app for a clean HD cut-out and find out in seconds.
FAQ
Can I mix natural light with my continuous lights for product photography?
Mixing daylight from a window with artificial light often causes color temperature mismatches. A daylight-balanced LED paired with warm late-afternoon window light creates warm-cool color casts across the product and background.
Either block most natural light and rely on continuous light alone, or turn off artificial light and shoot only with consistent window light from a large window.
If mixing is unavoidable, set all artificial lights to a daylight-balanced setting and keep them dominant over residual ambient light. Consistent, single-source color makes post-processing and accurate product color much easier and avoids uneven color across your batch.
Does the color of my walls and ceiling affect my product photography lighting?
Yes. Brightly colored walls and ceilings bounce tinted light onto products, especially with soft, wide light sources. A warm yellow wall can add a noticeable cast to your fill side.
Position lights and modifiers so most of the bounce light comes from neutral surfaces (white foam board, gray backdrops) instead of painted walls. If you cannot repaint, hang temporary white sheets near the shooting area.
This matters most when photographing white or pale items that pick up color shifts with almost no tolerance. Even the ceiling contributes; a low, cream-colored ceiling can shift highlights toward yellow if your lights aim upward and bounce back down.
What is the minimum lighting kit I need to start shooting products at home?
Start with a single continuous light with a softbox, a sturdy stand, and two pieces of white foam board for fill, plus a neutral background.
A single light can work for minimalist product photography setups if you are careful with light angle and distance from the background.
Add a second continuous light later to control background brightness more precisely or to act as a dedicated rim light. Careful placement and diffusion matter more than high wattage or expensive fixtures for small products on a tabletop.
How much space do I really need for a product photography lighting setup?
Many tabletop product photography lighting setups fit on a 4 ft (120 cm) table with about 5 to 6.5 ft (1.5 to 2 m) of working depth.
Place the table away from a wall so you have room behind for a background and possibly a background light source. Keep aisles wide enough to move light stands safely without bumping them, which would change shadow patterns.
Vertical space matters too: a standard ceiling height (8 ft / 2.4 m) allows positioning the main light above and angled down without clipping the ceiling. If your space is tighter, use compact LED panels instead of large softboxes to maintain diffuse light in a smaller footprint.
Should I upgrade to strobes once I understand continuous light?
Strobes offer more power per unit and freeze motion (useful if you need to shoot splashes or airborne items), but they add complexity because you cannot see the final lighting until you take a test shot.
For most small products and tabletop photography, modern continuous lights often provide enough power and are easier to learn with. Consider strobes only if you start shooting larger sets, working with very bright reflective items in ambient conditions you cannot control, or need to freeze motion on set.
Mastering continuous light and modifiers will cover most typical small-brand product photography needs. The skills transfer directly if you do move to strobes later; the principles of light direction, modifier size, and fill ratios stay the same.