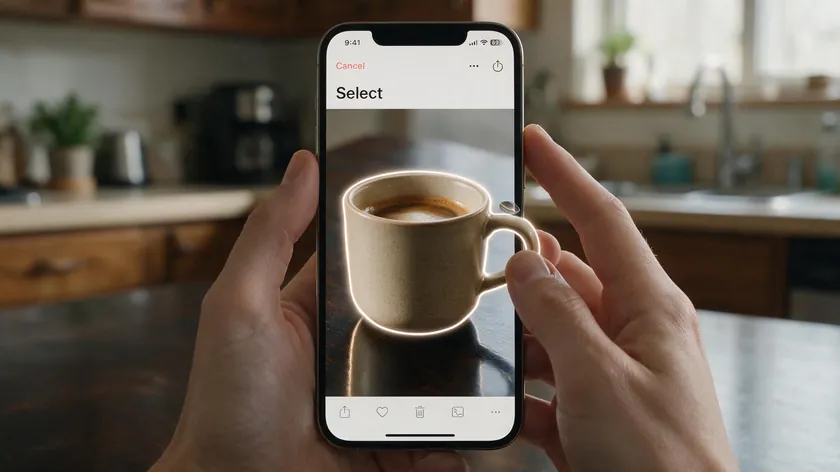
Your iPhone can erase a photo’s background natively using a simple touch-and-hold gesture called “Lift Subject from Background,” available since iOS 16. The feature works right inside the Photos app, Files app, and even Safari—no downloads required.
This guide walks you through the Photos method step by step, explains how to save the result as a standalone image, covers the Files app shortcut, and flags when RemoveBackground.app is the better option for your workflow.
Table of Contents
What you need before erasing a background on iPhone
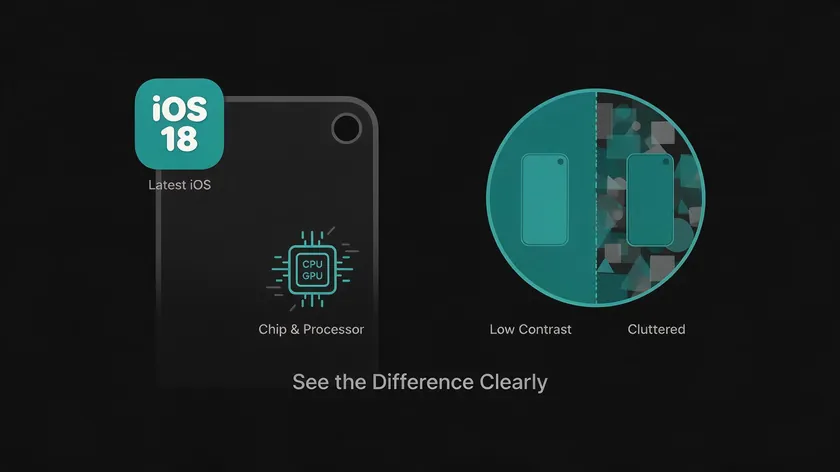
Before you tap anything, make sure your device and image meet a few basic requirements. The feature relies entirely on on-device machine learning—so it works offline—but hardware and image quality both matter.
Here is what you need:
iPhone model
Background removal is available on iPhone XS, iPhone XR, and newer models (iPhone 11 through 17 series, plus iPhone SE 2020/2022). Older devices like iPhone 8 or iPhone X do not support this feature, even if updated.
iOS version
iPhones running iOS 16 can isolate subjects in photos. iOS 17 added sticker-saving and paused video frame extraction; iOS 18 introduced additional editing enhancements.
Image clarity
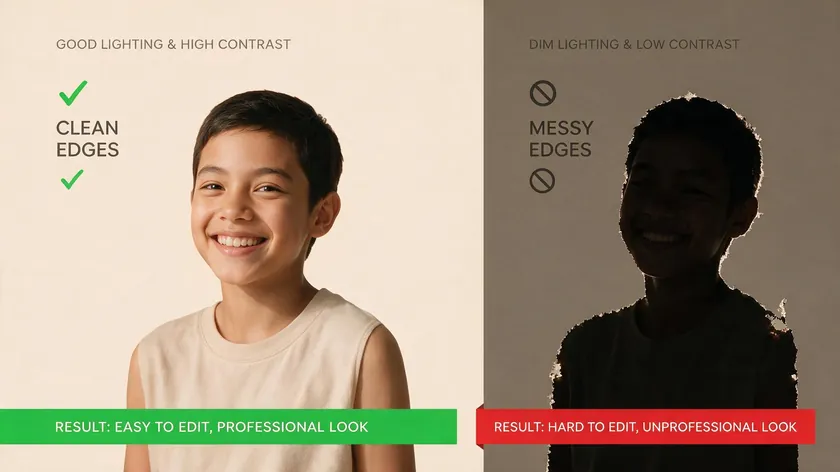
The device will automatically detect the main subject using AI segmentation, which helps identify subjects and backgrounds accurately. Results are best when the subject contrasts sharply with the background—think a vase on a white table, not a brown dog on brown carpet.
Full-resolution image
If you use iCloud with “Optimize Storage,” wait for the full photo to download before attempting the gesture.
Apple’s Visual Look Up uses machine learning to identify subjects automatically, and it is the same on-device intelligence that powers Live Text and related features. Apple published research on its fast class-agnostic salient object segmentation model, which assigns each pixel a foreground vs. background score in real time.
Native tools are ideal for quick cutouts, social media posts, product mockups, and stickers. For complex commercial work requiring precise editing or batch processing, a dedicated AI background removal tool may serve you better.
How to erase the background in the Photos app

The Photos app is the main place you will remove the background from images in your camera roll. The process takes seconds and does not overwrite your original photo—the subject cutout is created only when you copy or share it.
- Open the Photos app and choose a picture from Recents or Albums.
- Tap and hold the main subject with your finger for about one to two seconds. Holding a subject in the Photos app creates a glowing outline around it—a white shimmer that traces the edges of the detected object.
- Once the outline appears, you will see options: tap Copy, Share, or Add Sticker (iOS 17+). Choosing copy lets you paste the subject into other apps like Messages, Notes, Keynote, or Pages.
- Users can paste isolated subjects into other apps after copying—simply open the destination app and paste.
If the outline does not appear, try zooming in on the subject, then long-press again. Busy photo backgrounds or very low-resolution snapshots sometimes prevent the feature from triggering reliably.
Practical example: Imagine you have a product photo of a ceramic mug on a cluttered kitchen counter. Long-press the mug, tap copy, switch to Notes, and paste—you now have a clean cutout ready for a catalog layout, and the original photo remains untouched in your gallery.
The built-in Photos feature can isolate and copy subjects without saving a transparent PNG directly. To actually save the cutout as its own file, you need one more step.
How to save a background-free image from Photos
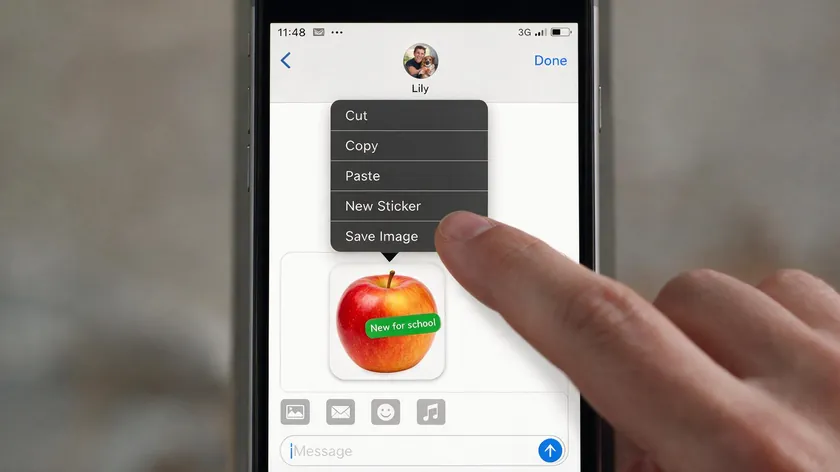
The Photos app does not always show a direct “Save as PNG” button after lifting a subject. A quick workaround through Messages, Mail, or Notes gets the job done.
- Lift the subject in the Photos app and tap copy.
- Open Messages and start a conversation with yourself or a friend (any thread works).
- Paste the copied subject into the message field—it appears as a sticker-like image.
- Tap and hold that image, then choose Save Image.
The cutout is now stored in your camera roll as a separate new image with the background removed. You can export images as PNG for transparency after background removal, which is the format most design tools expect for layered compositions.
The same idea works if you paste into Notes or Mail—tap the pasted cutout, then share and save to Photos. Messages is the most straightforward route for most users.
If you plan to use the image for print or e-commerce listings, check its resolution and note that some detail loss around hair or fine edges is normal with the native process.
How to erase backgrounds using the Files app
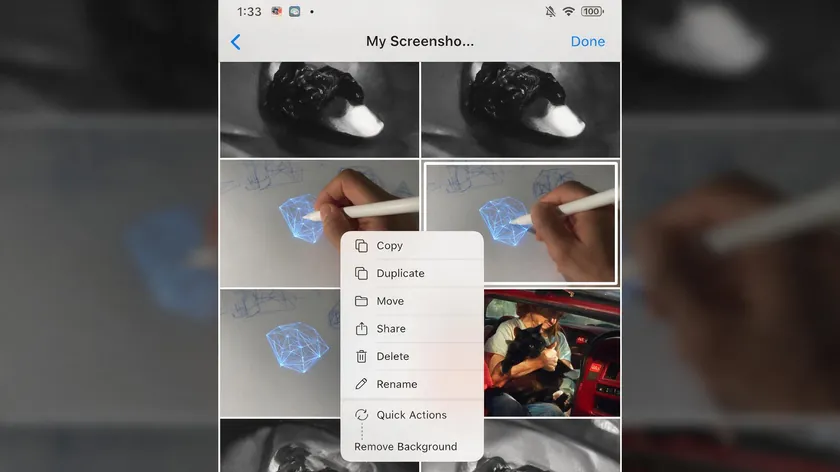
The Files app gives you a very fast remove background option for images stored in iCloud Drive, On My iPhone, or your Downloads folder. Background removal can be done directly from the Files app without opening the image first.
- Open the Files app and navigate to a folder containing a JPG or PNG image.
- Tap and hold the image thumbnail without opening it.
- In the context menu, select Quick Actions, then tap Remove Background.
iOS immediately creates a new file in the same folder—usually named something like “Background Removed.png”—with full transparency. The original image remains untouched, making this a true file-level operation that is helpful for presentations, web design, or uploading assets to other software.
Watch for occasional resolution changes or compression when using this method. Users who care about maximum quality for product photos should check the output dimensions and consider a dedicated background removal tool when they need more control over edge refinement.
How to remove the background from images in Safari and other apps
You can lift subjects not only from the Photos and Files apps but also directly from Safari, Messages, and other Apple apps that support images.
In Safari, tap and hold an image on a webpage until the context menu appears, then choose Copy Subject. This lifts the foreground object and sends it to your clipboard—no need to save the full page image first. You can then paste the cutout into Notes, Keynote, or Messages using the same workflow described earlier.
Similar touch-and-hold gestures work for images in Mail, Messages, and Quick Look—anywhere Apple supports Visual Look Up–style interactions. The exact menu wording might vary between “Copy,” “Share,” or “Add Sticker” depending on the app and iOS version.
One note: these in-app methods are convenient but sometimes inconsistent across third-party apps. Saving the image to Photos or Files first is usually a more reliable trick if the gesture does not respond as expected.
Tips for better background removal results on iPhone
A few small adjustments to how you shoot and select images can dramatically improve your cutouts.
- Maximize contrast. Subjects should contrast with backgrounds for better removal results. A white sneaker on a dark floor will isolate far more cleanly than on a white sheet.
- Use even lighting. Good lighting improves AI detection of edges and details—especially around hair, fur, or translucent materials. Avoid harsh overhead shadows.
- Avoid blur. Motion blur and very low-resolution snapshots degrade the segmentation model’s accuracy. Shoot with a steady camera and adequate light.
- Try Portrait mode. Portraits taken with shallow depth of field naturally isolate the subject, making the lift subject gesture more predictable.
- Zoom and retry. If the iPhone keeps selecting the wrong object, zoom in on the area you want, then long-press again to help the feature focus and lock onto the correct subject.
- Refine with a dedicated tool. For edge cases like intricate jewelry or transparent accessories, AI-powered tools use machine learning for background removal with finer control. Some dedicated editors include an erase tool you can use to refine edges after background removal—something the native iPhone feature does not offer. A dedicated AI background removal tool can customize the output to meet stricter standards.
Combine a few of these tips—good lighting, strong contrast, and a steady shot—and most cutouts will look clean on the first try, with little to no cleanup needed afterward.
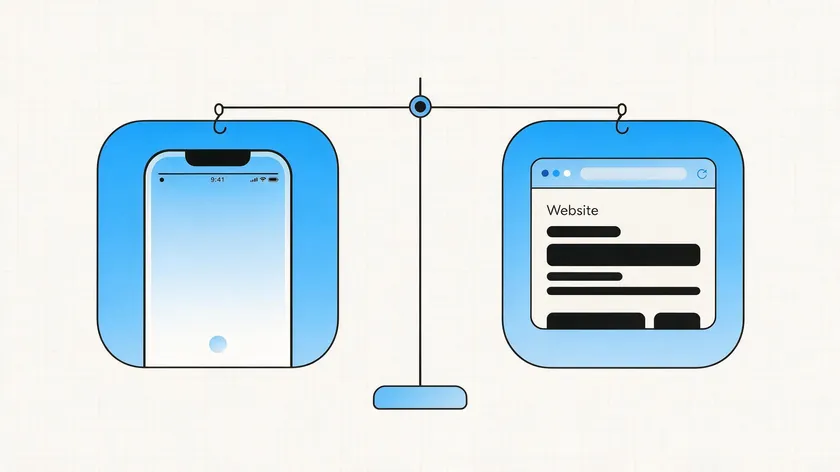
Apple’s built-in feature handles quick, on-the-go edits directly on your device, while RemoveBackground.app is designed for higher-volume or brand-sensitive workflows. Here is how they compare:
| Attribute | Native iPhone (Photos / Files) | RemoveBackground.app |
|---|
| Where it runs | On-device, no upload needed | Browser-based, works on any device |
| Best for | Social media posts, quick stickers, casual edits | Product catalogs, marketing teams, bulk processing |
| Edge control | Good automatic detection | Advanced refinement options |
| Batch processing | One image at a time | Multiple images in a single session |
| Output format | PNG with transparency | PNG with transparency, plus additional export options |
| Collaboration | Solo iPhone use | Share links and assets across a team on iPhone, Mac, or desktop |
| Cost | Included with iOS | Purpose-built tool—often lower cost than a full desktop editing suite |
For users who already pay for desktop editing software, RemoveBackground.app is a faster, lower-cost way to handle background removal specifically, without opening a full desktop editor for a single task. The native iPhone feature is most convenient when you are working entirely on your phone.
Many photographers and creators combine both methods—starting with iPhone background removal for quick drafts and switching to RemoveBackground.app when they need consistent, production-ready output.
If you also edit images on desktop, similar workflows apply there too—see our guides on how to remove white background in Photoshop and how to remove background from image in PowerPoint for platform-specific steps.
Key Takeaways
- You can erase a photo’s background directly on iPhone using touch-and-hold “Lift Subject from Background” (iOS 16+), plus the Files app’s Remove Background quick action and Safari’s Copy Subject—all without third-party apps.
- This works on iPhones running iOS 16 or later and supports photos, paused video frames, and images inside apps like Safari, Files, and Messages.
- Save your lifted subject as a standalone transparent PNG by pasting it into Messages (or another app) and then saving the image back to the Photos app.
- Good lighting and a clearly separated subject from the background are the biggest factors in getting a clean, reliable cutout.
- For advanced use cases—large product catalogs, brand kits, or multi-channel campaigns—RemoveBackground.app offers more control and consistency than native iPhone tools alone.
Once you are comfortable erasing backgrounds on iPhone, you can streamline larger or more complex projects with RemoveBackground.app. It is the logical next step for teams or creators who need higher throughput, more consistent cutouts, or easy integration into existing design workflows.
Try it with a few images you have already edited on your phone—compare the quality and speed and learn how much time you save when the job scales beyond a handful of pictures.
The following questions cover edge cases not fully addressed above.
FAQ
Why can’t I see the “Remove Background” or “Copy Subject” option on my iPhone?
Your device may be running an iOS version older than 16, or the iPhone model may lack the required A12 Bionic chip (iPhone 8, 8 Plus, and iPhone X are not supported). The option also will not appear if the image is too low-resolution or heavily compressed or if the subject blends into the background so thoroughly that the model cannot isolate it.
Make sure the full-resolution image has downloaded if you use iCloud’s Optimize Storage setting.
Does iPhone background removal keep the original photo?
Yes. The original photo stays in Photos or Files exactly as it was. The lifted subject is created separately only when you copy, share, or save it through the methods described in this guide. You never risk overwriting the source image.
What file type do I get when I remove the background on iPhone?
Most saved cutouts use the PNG format, which preserves transparency. This is ideal for layered designs, presentations, or any page where you want the subject to sit naturally on a different background. If you paste into an app that does not support transparency, the background may default to white.
Can I erase only part of the background manually in the Photos app?
No. Apple’s native tool focuses on automatic subject extraction—it selects the entire main subject and removes everything else. For manual brush-style control where you need to select or replace specific areas, you would need a dedicated editor.
A dedicated editor or background removal tool offers finer manual adjustments alongside its automatic process.
Is iPhone background removal good enough for professional product photos?
It often does a solid job for marketplace listings, social media posts, and small-scale catalogs—especially when the original image has clean lighting and strong subject-background contrast. However, larger catalogs or strict brand guidelines typically demand consistent, bulk processing with advanced edge refinement.
In those scenarios, a dedicated AI background removal tool like RemoveBackground.app delivers more reliable and uniform results across every image.