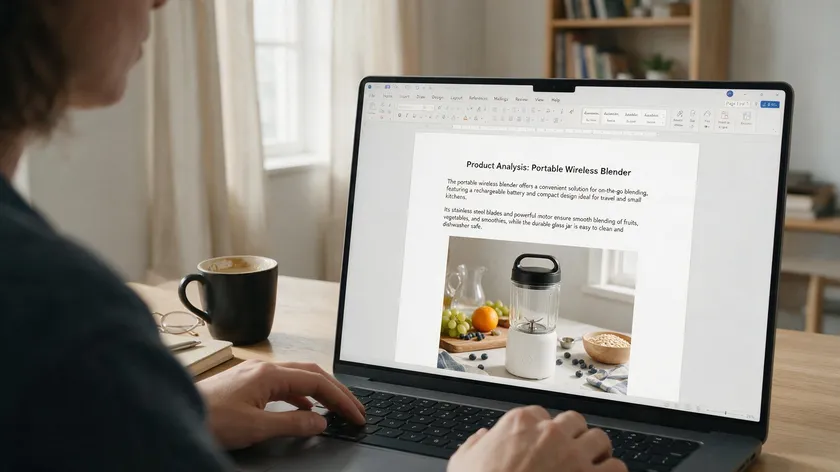
Microsoft Word has a background removal tool that simplifies eliminating unwanted elements from images directly inside a Word document. The feature saves time during document creation, and background removal enhances document aesthetics and readability across every version from Word 2010 through Microsoft 365.
Word’s built-in tool works well for simple photos, but it can struggle with complex images during background removal—hair, fur, and busy scenes often need lots of manual correction. A specialized tool like RemoveBackground.app is the easier way to get rid of messy edges when Word falls short.
This guide covers picture background removal, Wrap Text layout options, page background color changes and closes with a comparison table and FAQ addressing Word Online limitations.
Table of Contents
How to Remove Background of a Picture in Word (2010–2024)
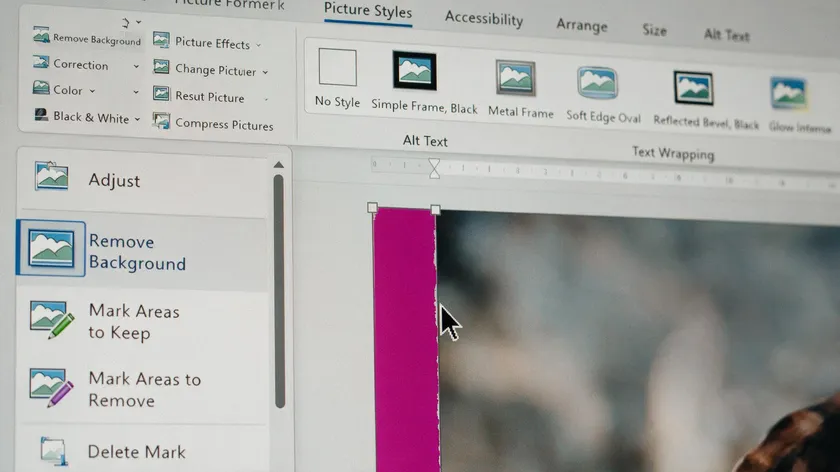
Background removal in Word is available in versions 2010, 2013, and 2016, as well as Word 2019, 2021, and Microsoft 365 on both Windows and Mac. The ribbon tab names differ slightly—older versions show “Format” while newer ones say “Picture Format”—but the workflow is effectively the same.
To remove the background from an image in Microsoft Word, follow these steps:
- Go to Insert → Pictures and select your image from a file or device.
- Click the picture, then select picture format on the toolbar and click Remove Background.
- Word highlights the background in magenta to indicate what it plans to delete—the default background area is everything outside the detected subject.
- Adjust the bounding rectangle handles to encompass your subject closely.
- Users can refine selections using Mark Areas to Keep or Mark Areas to Remove by drawing over misclassified areas.
- Click Keep Changes when satisfied, or use the discard all changes option to start over if mistakes are made.
The Remove Background tool works especially well for simple backgrounds where the subject has strong contrast and clear edges—think a product on a solid white or grey background. High-resolution photos may slow performance inside a Word file, so compress images via Picture Format → Compress Pictures for large reports.
Word Online currently does not offer the Remove Background button. If the option is missing in your browser, download the document and edit in desktop Word instead. The tool simplifies the editing process for users who need to check images quickly without leaving MS Word.
Refining Cutouts and Handling Text Layout in a Word Document
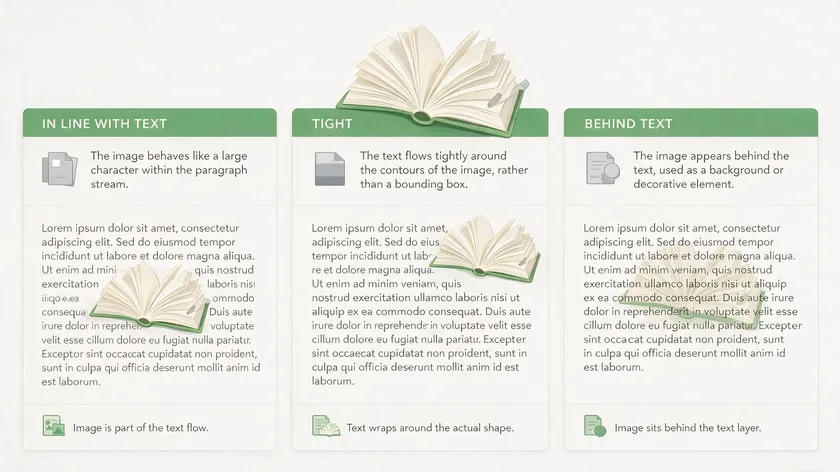
Once you remove the background, the next challenge is making the cutout visible and correctly positioned among paragraphs. Wrap Text settings on the ribbon control this layout behavior:
In Line with Text
Treats the image as a text character; transparent areas appear as blank space, useful for logos on a cover page.
Tight
Through—Text wraps closely around the non-transparent areas of the selection, which is ideal for product photos in a marketing brochure.
Behind Text / In Front of Text
The image floats as a layer; use Bring Forward or Send Backward (right-click the picture) to adjust the order so content remains readable.
When leaving Behind Text active, paragraphs may hide parts of the cutout. Lock the anchor position via Layout Options → Fix position on page so objects don’t shift during edits.
Avoid excessive scaling—rough edges from Word’s built-in removal become more visible at larger sizes. Keep the aspect ratio locked and crop rather than enlarge.
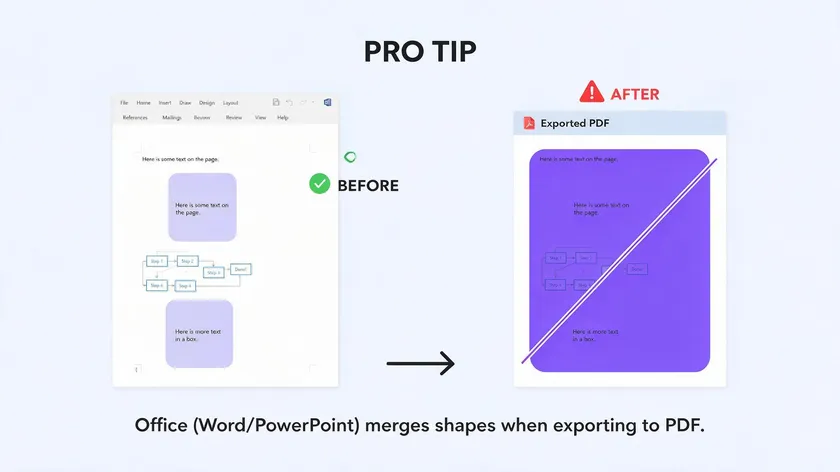
Exporting to PDF via File → Export → Create PDF/XPS preserves transparency better than third-party print drivers, which sometimes flatten transparent areas into a solid color.
Changing or Removing Page Background Color in MS Word
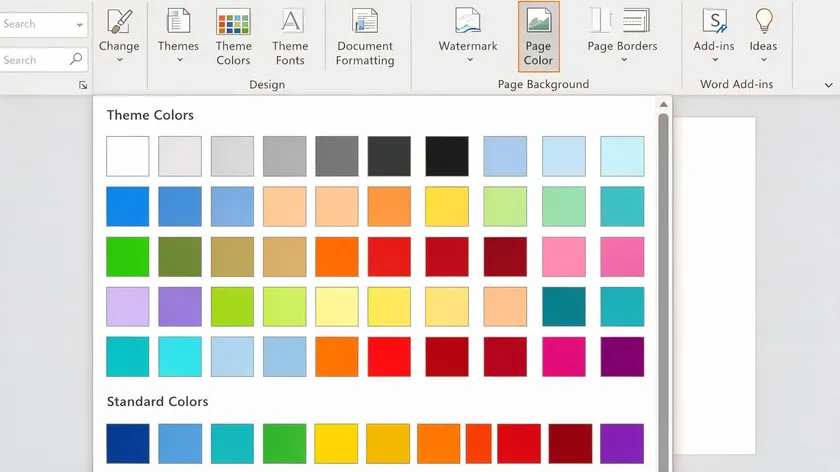
An image background belongs to a picture; page background color applies to the entire document page. They are independent settings that people often confuse.
- Navigate to Design → Page Color (in Word 2010, this lives under the Page Layout tab).
- Choose from Theme Colors, Standard Colors, or More Colors—a highlight of color will appear behind all text and images on-screen.
- To delete the background color entirely, select Page Color → No Color—needed before printing official letters or academic essays.
To print background colors, enable File → Options → Display → “Print background colors and images.” Without this option toggled on, the color won’t appear on paper. Note that most printers cannot print full bleed, so white margins may remain even with a background color set.
Watermark-like background text (e.g., CONFIDENTIAL or DRAFT) is a separate sign—see the FAQ below for removal steps. Using document themes under Design can standardize background color across a multi-page report when multiple people edit the same document over time.
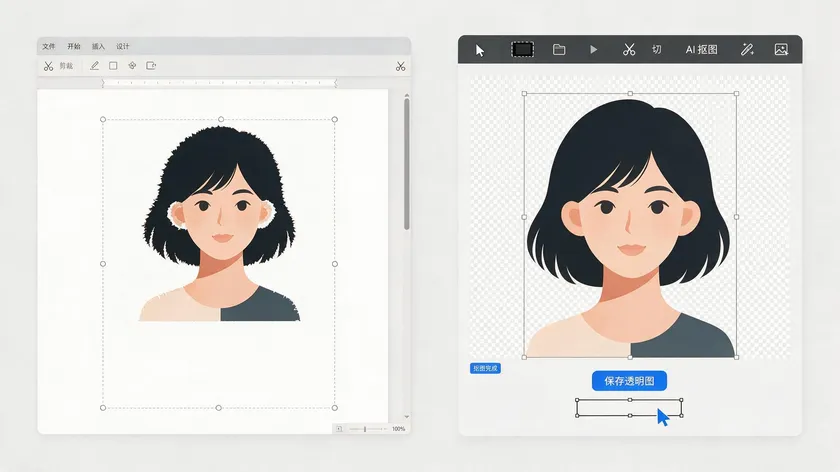
Word’s background removal was never designed as a full image editor. When you need to mark and re-mark areas repeatedly—removing halos, fixing hair, or separating a subject from a similarly colored background—the work becomes tedious.
Dedicated online services process complex images more accurately than Word, often completing background removal in seconds rather than requiring manual mark-and-remark work. Windows Paint 3D can also remove image backgrounds for easy single-file edits. Several popular AI-powered background remover apps exist as well. For documents with many images, a purpose-built solution saves significant time.
Practical workflow: export the original image, upload it to RemoveBackground.app, download the transparent PNG, then reinsert it into Word via Insert → Pictures. Users can create professional-looking documents effortlessly this way.
If you also work in Excel or PowerPoint, similar workflows apply—check our sibling guides on removing backgrounds in PowerPoint and Photoshop for app-specific steps.
| Feature | Word’s Built-in Tool | RemoveBackground.app |
|---|
| Accuracy (simple background) | High | Very high |
| Complex images (hair, glass) | Moderate—needs manual correction | Strong automatic detection |
| Speed for multiple images | Slow, one-by-one inside document | Fast batch processing |
| Edge smoothness | Can leave halos | Clean, smooth edges |
| Learning curve | Minimal—built into Word | Minimal browser-based upload |
| Cost | Included with Microsoft Word | Paid tool (no Photoshop-level cost) |
Key Takeaways
- Word’s built-in Remove Background tool works directly on pictures inside a document (Insert → Pictures → Picture Format → Remove Background), handling simple photos well but struggling with complex backgrounds, hair, or busy scenes—a specialized tool like RemoveBackground.app closes that gap.
- After removing a picture’s background, Wrap Text settings (In Line with Text, Behind Text, In Front of Text, Tight, and others) determine how the cutout sits among paragraphs and headings and often need adjusting to avoid layout issues.
- Page background color (Design → Page Color) is separate from an image’s background—removing it (Page Color → No Color) is usually required before printing official documents, and both settings affect how the file looks when exported to PDF.
- For complex photos meant for client proposals, product sheets, or public reports, processing images through RemoveBackground.app before inserting them into Word gives cleaner, more consistent edges than Word’s built-in tool alone.
If you regularly work with images in Word—whether you’re a marketer, teacher, or part of a documentation team—use RemoveBackground.app to prepare clean, transparent images for your Word documents and skip the tedious manual marking.
FAQ
How do I remove background text or a watermark that looks like a background in Word?
Background text like DRAFT or CONFIDENTIAL is a watermark, not part of the image or page background color. In Word 2013 and later, go to Design → Watermark → Remove Watermark. In Word 2010, find the Watermark button under the Page Layout tab.
If someone created the watermark manually as a text box in the header/footer, double-click the header area, select the object, and delete it from that layer.
Can I remove the background from a picture in Word Online?
As of 2026, the Remove Background button is not available in Word Online. Download the document, open it in desktop Word for Microsoft 365 or Word 2021, remove the background there, and then save it back to OneDrive.
Alternatively, upload images to RemoveBackground.app before inserting them—this avoids relying on browser-based editing tools entirely.
Why does my transparent image show a solid background when I print or export to PDF?
Some printer drivers flatten transparency, producing a white or colored rectangle behind a cutout. Insert images as PNG files (not JPEG, which lacks transparency support) and use Word’s native File → Export → Create PDF/XPS rather than third-party PDF printers. For critical print jobs, always test-print one page first.
Does removing an image background in Word reduce image quality?
The Remove Background command does not change base resolution, but compressing images or repeatedly saving in older .doc format can introduce quality loss. Keep original high-resolution copies outside the word file, and review cutouts at 100% zoom—edges often look rougher at extreme zoom levels than they appear in a final PDF or printed copy.
For more information on preserving quality, reinserting a fresh PNG with background already removed is the safest approach.
Can I change the background color behind a transparent image without editing the picture itself?
Yes. Once the image background is removed, the color you see behind the picture comes from either the page background color or shapes placed behind it. Insert a rectangle via Insert → Shapes, set its fill color, then right-click and choose Send to Back.
This lets you test how a logo or product photo looks on different backdrop colors directly inside a Word proposal without re-editing the original picture each time.