
Canva’s real background remover and transparent PNG export are locked behind Canva Pro as of 2026. This article shows the realistic paths around that, including RemoveBackground.app as the way to get a transparent background before ever touching Canva Pro.
Below, you will find what Canva can and can’t do on the free tier, how the Pro background remover actually works, and how to combine RemoveBackground.app with Canva for logos, product shots, and social media posts.
Table of Contents
What “Transparent Background” Really Means in Canva
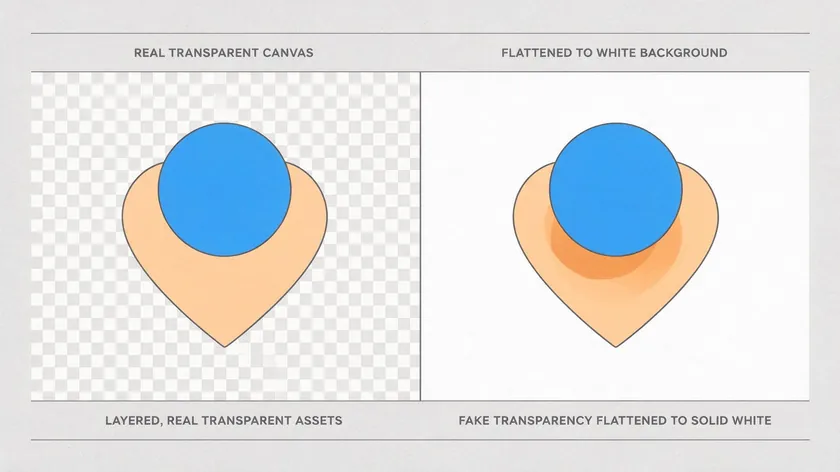
A transparent background means no pixels and no background color exist behind the subject. Whatever sits underneath the image shows through, because the file carries an alpha channel that marks those areas as empty. This is not the same as a white background that “looks” transparent inside the editor.
If the terminology itself is confusing, our explainer on what it’s called when an image has no background breaks down the alpha channel concept in more depth.
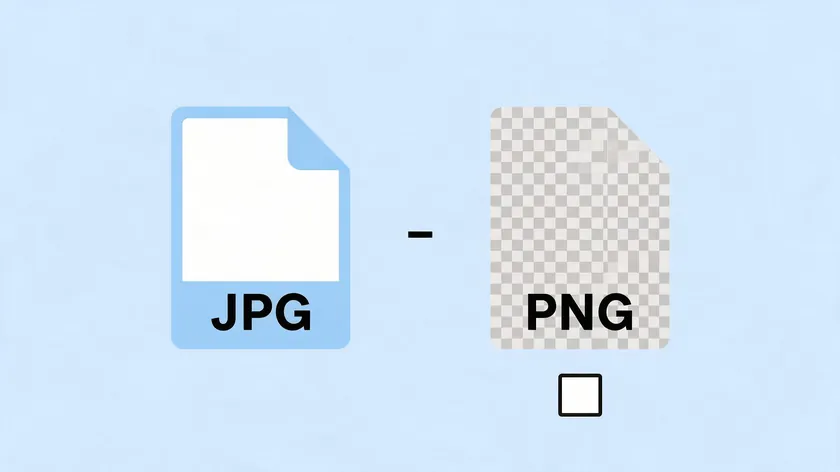
The file type matters here. PNG format supports real transparency through its RGBA color model, while JPG has no alpha channel and always fills empty space with a solid color.
This is the same rule to keep in mind any time you save an image with a transparent background, no matter which tool created it. If you export your design as a JPG, you will never get a transparent file, regardless of plan or settings.
Common use cases for a transparent background in Canva include making a logo background transparent so it sits cleanly on website headers of any color, exporting product cutouts for e-commerce listings, and creating overlays or stickers for social media templates with complex image backgrounds.
If your focus is specifically on branding, our guide on how to make a logo transparent covers that workflow in more detail.
This article focuses on background transparency, not the general transparency slider for text or shapes. The confusion starts because Canva’s top toolbar shows a “Transparency” option on every element.
Users drag that slider, see the checkerboard icon appear behind their photo, and assume the downloaded file will also be transparent. It will not, unless the export settings and plan tier both support it.
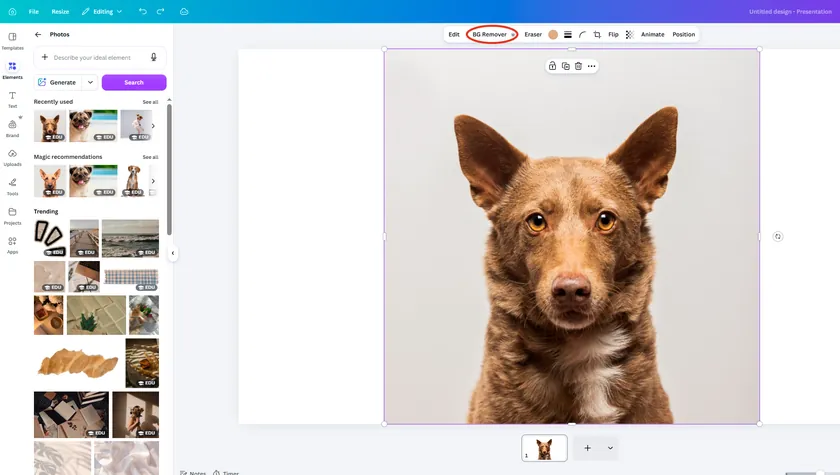
Inside Canva’s editor, the background remover lives under Edit Image, then Background Remover (sometimes labeled BG Remover). The background remover tool is exclusive to Canva Pro, Teams, Education, and nonprofit plans.
Free accounts can see the button, but clicking it triggers an upgrade prompt instead of processing the image.
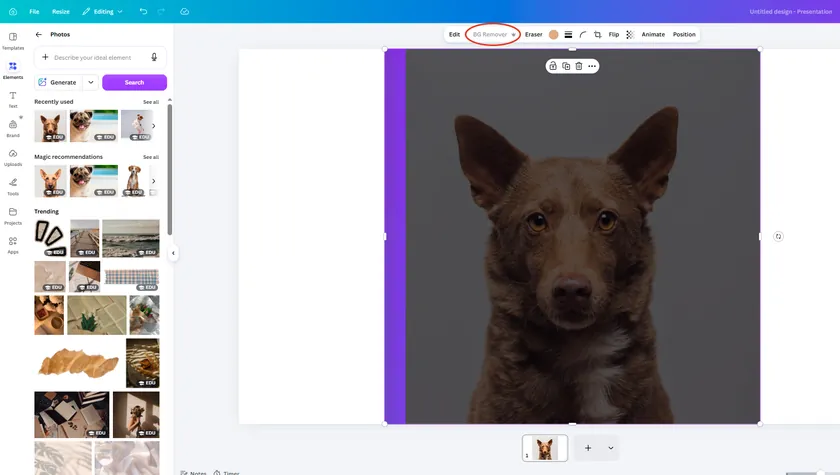
When unlocked for Canva Pro users, the tool does the following:
- Detects the subject using AI and strips the existing background in seconds.
- Lets you refine results with Erase and Restore brushes in the advanced settings panel. Use the Pixel Eraser for precise background removal adjustments around hair, edges, or fine details.
- Preserves the cutout on a checkerboard canvas, indicating true transparency.
On top of this, the “Transparent background” checkbox in the click download dialog is also Pro-gated. Only Canva Pro allows downloading images with a transparent background. Even if a free user somehow removes a background image visually, the export will include a white or colored fill.
RemoveBackground.app solves this by handling the cutout step before the image ever enters Canva. Upload your photo, run the AI background remover, download a transparent PNG, and then import that clean file into any Canva account.
Canva markets one-click background removal across its platform, but the free plan cannot use it for logo background transparent exports or any other transparent output.
What You Can and Can’t Do on Canva Free vs Canva Pro
The rules split sharply between tiers for anything involving a background in Canva. The table below maps the differences across Canva Free, Canva Pro, and RemoveBackground.app.
| Feature | Canva Free | Canva Pro | RemoveBackground.app |
|---|
| Background remover tool click | Locked; shows upgrade prompt | Full access; Edit Image then BG Remover | AI removal before Canva import |
| Transparent background export (PNG) | Not available | Available via download dialog checkbox | Download transparent PNG directly |
| Logo background transparent | Must upload a pre-made transparent PNG | One-click removal and export | Process logo, download PNG, upload to Canva |
| Transparency slider (element opacity) | Available | Available | N/A |
| SVG export | Not available | Available | N/A |
| Storage | ~5 GB | ~100 GB | Cloud-based; 25 MP / 30 MB per upload |
| Cost | Free | Subscription (~$15–20/month, US) | Credit-based subscription |
Canva Free users can upload PNG images that already have a transparent background. They can adjust the transparency slider on any element to create images with semi-transparent overlays.
They can design on a blank canvas with a white background, but they cannot truly export a file with no background, and they cannot run the background remover tool inside the editor.
Canva Pro adds the one-click background remover, the transparent background option in the PNG file type selector on export, and the ability to edit photo cutouts with Erase and Restore brushes.
There is no free or trial way to get a genuine transparent PNG export inside Canva itself; an upgrade or an external tool is the only path forward.
Two Paths to a Transparent Background in Canva
Two realistic routes exist for making background transparent in Canva. The first uses Canva Pro’s own background remover and transparent PNG export. The second uses RemoveBackground.app to handle the cutout, then brings the clean file into Canva Free.
Both paths are covered below so you can jump to whichever matches your current Canva account.
Step-by-Step: Making a Transparent Background in Canva Pro
This section applies only to readers who already have Canva Pro or access through a team, education, or nonprofit plan.
- Upload your image to a Canva Pro design. Select the image on the canvas, then go to Edit Image and click Background Remover.
- Wait for the AI to remove the background. Canva’s BG remover tool removes backgrounds in seconds.
- Refine with advanced settings. Use the Erase brush to clean leftover areas or the Restore brush to bring back parts the AI removed incorrectly.
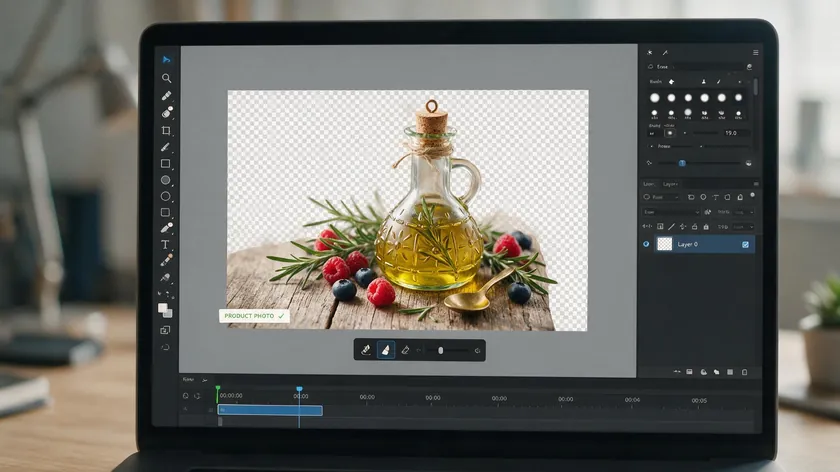
- Delete any remaining solid color or images on the canvas background layer. Click the background, then use the trash icon to remove it. The checkerboard pattern should appear, confirming no fill exists behind your subject.
- In the top right corner, click the Share button to download your design. Choose PNG as the file format, check the “Transparent background” box, and confirm the correct page is selected. Click download.
This workflow handles profile photos, product PNGs, and quick social graphics well. It only works, though, if the Canva account is already paying for Pro.
How to Make a Transparent Background in Canva If You Don’t Have Pro
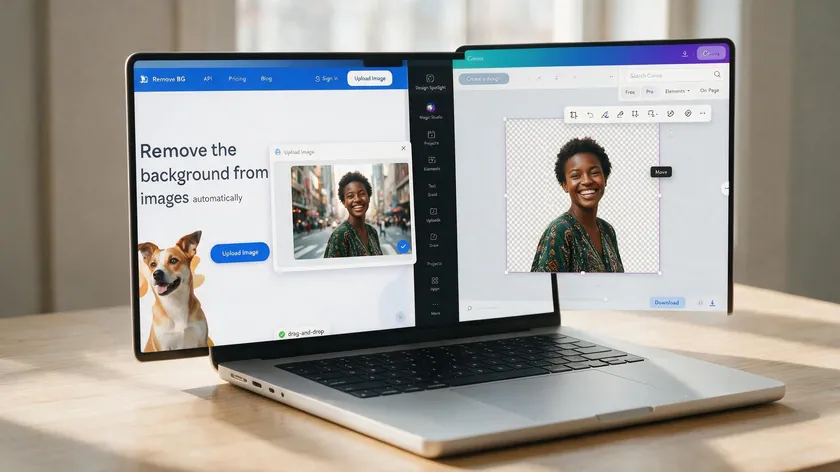
Canva Free cannot export transparent PNGs or run the background remover tool on its own, regardless of the project type. Canva Free users must use external tools for transparency.
The workable path is to handle the cutout outside Canva, then bring that transparent PNG back in for layout and text.
- Upload your image to RemoveBackground.app.
- Use the background remover to strip the existing background from the image.
- Inspect the edges around the subject for accuracy.
- Download the result as a PNG file with transparency.
- Upload that transparent PNG into Canva Free. Place it over any background image, color, or graphic, keeping the logo background or subject area transparent.
Do not confuse “fake transparency” with real transparency. Setting the Canva canvas to white or very light gray looks clean in the editor but still produces a solid color fill in the final file. The only way to get a real transparent export on Canva Free is to start from a PNG that already has its background removed.
RemoveBackground.app plus Canva Free gives users a working transparent PNG workflow without committing to Canva Pro for one or two images. The process involves uploading an image and downloading it as a transparent PNG; Canva then serves as the layout tool.
Use Cases: When a Transparent Background Actually Helps Your Design
Not every design needs a transparent background, but several scenarios depend on it.
- Making a logo background transparent so the same file works on dark website headers, light email signatures, and colored social banners without a visible box.
- Exporting product photos for e-commerce marketplaces that require uniform image backgrounds or no background at all.
- Creating stickers, badges, or video thumbnail overlays that sit cleanly on top of other designs.
- Overlaying a transparent PNG headshot or object on gradient backgrounds for social media posts, avoiding the white frame that screams “unfinished.”
- Building a small library of transparent brand assets (logos, icons, recurring product angles) that drag into new Canva projects without re-running the background remover each time.
Images with transparent backgrounds allow seamless integration into designs and enhance design flexibility across platforms, from presentations to printed flyers. Both Canva Pro users and Canva Free users paired with RemoveBackground.app can build these asset libraries.
The difference is where the background removal step happens, not the quality of the final output.
Common Mistakes When Trying to Make an Image Transparent in Canva
Many issues stem from mixing up opacity controls with real transparency and from misusing the click download options in the export dialog.
- Downloading as JPG instead of PNG. JPG does not support transparency; every empty area fills with a solid color. Always select PNG file type.
- Forgetting to tick “Transparent background” in Canva Pro’s download dialog. The box is unchecked by default.
- Leaving a background color layer active on the canvas. Even after using the BG remover, a hidden fill rectangle can persist. Delete it via the trash icon or set the canvas to no color.
- Assuming a white background equals transparency. Inside the Canva editor, white and transparent look identical unless you check for the checkerboard pattern.
- Confusing the transparency slider with an actual background remover. The slider makes an element see-through on screen; it does not delete pixels or create a transparent export.
- Stretching low-resolution transparent PNGs across large canvases. The edges turn fuzzy, and logos lose sharpness. Start with a source image at least 2x the intended output size.
- Exporting from the mobile app instead of the desktop browser. Mobile exports sometimes ignore the transparent background toggle even when it appears enabled.
Understanding Canva’s limitations and the right file format avoids most frustration around “why isn’t my image transparent?” Double check your export format, your canvas layers, and your plan tier before downloading.
Key Takeaways
- Canva’s true background remover and transparent background export are exclusive to Canva Pro, not Canva Free.
- PNG is the only reliable file format for a transparent logo background or cutout subject, whether exported from Canva or from RemoveBackground.app.
- Adjusting the transparency slider on a background image in Canva does not create an image transparent file. It only changes how the element looks inside the design.
- The most practical workflow for non-Pro users is: RemoveBackground.app, download the PNG, upload to Canva, design, and export.
- Treat Canva as the layout and branding tool. Treat RemoveBackground.app as the specialized background remover companion.
Knowing these boundaries lets you pick the fastest path to a transparent background instead of hunting for a feature that Canva’s free tier does not offer.
Ready to get a real transparent background without upgrading your Canva account? Use RemoveBackground.app to remove backgrounds from your images first, then drop those clean PNGs into any Canva design for logos, product shots, and social media posts that actually sit on top of your layout, not inside a white box.
FAQ
These questions cover edge cases and practical details not fully addressed above. Each answer is kept short and direct.
Can I make only part of my Canva design transparent?
You can adjust the transparency of individual elements (photos, shapes, text) using the checkerboard icon and the transparency slider on the top toolbar, regardless of your plan.
This changes how opaque those objects look on the canvas but does not produce a transparent PNG background by itself. Use this for subtle overlays, watermarks, or faded imagery behind text.
If you still need the overall background transparent, you must export as a PNG with the transparency checkbox (Pro only) or start from a transparent PNG created via RemoveBackground.app. Element opacity and file transparency solve different problems.
Why does my “transparent” image from Canva show a white box on other sites?
This typically happens because the file was saved as a JPG, or the “Transparent background” checkbox was not enabled during export from Canva Pro. Some platforms also add their own background color to profile image slots even when the uploaded file is a valid transparent PNG.
Check the file format first; it must be a PNG. If you are on Canva Free, start from a PNG generated by RemoveBackground.app instead. Test the file by placing it over a colored background; if you see a white box, the file is not truly transparent. Always confirm transparency before uploading brand assets widely.
Can I change the background after removing it with RemoveBackground.app?
Once the background is removed and saved as a PNG, you can place that subject onto any new background image or color inside Canva. You can create multiple versions of the same subject on different backgrounds without re-running the background remover each time.
If the cutout edges need tweaking, reprocess the original photo in RemoveBackground.app for a cleaner result.
This workflow fits seasonal product shots, campaign-specific hero imagery, and platform-specific crops. Keep both the original photo and the transparent PNG in an organized folder for future edits.
Does Canva change image quality when I download a transparent PNG?
Canva may compress or rescale images depending on canvas size and export resolution, which can affect sharpness around fine edges. Start with a reasonably high-resolution source photo and avoid unnecessary upscaling inside the Canva editor.
Using RemoveBackground.app first does not prevent Canva from resizing later, so match your canvas dimensions to the target use (for example, 1080×1080 for an Instagram post).
Download at standard resolution first. Only explore higher resolution exports if the output looks soft on larger screens. Quality depends more on starting resolution and scaling habits than on whether the background is transparent.