
Google Slides offers several methods for removing backgrounds from images, but the platform still does not allow complete background removal through its standard built-in tools. Most users need a combination of native features and an external tool to get a clean, professional result.
The basic workflow is straightforward: remove the background from your image before or after inserting it into your Google Slides presentation, then position the edited image on your slide.
For some Google Workspace accounts, Google Workspace Labs and Gemini now offer a “Remove background” option directly inside Slides. Every account can access Format options → Adjustments → Transparency to fake a transparent effect across the whole image—though that changes opacity for the entire picture, not just the background.
When you need a true cut-out, RemoveBackground.app fits smoothly into this workflow as a dedicated AI background remover: upload your photo, remove the background, download the PNG, and then insert it into your slides.
Table of Contents
How background removal works in Google Slides today
If you’ve ever wondered how to remove background from picture on Google Slides, the honest answer is that native options are limited. Google Slides provides crop, mask, and transparency controls for any inserted image. For certain Google Workspace and Google One AI Premium subscribers, a newer “Remove background” feature—powered by Google Workspace Labs and Gemini—can automatically detect the subject and strip away the image background.
Unlike PowerPoint, which includes a built-in background removal tool available to all desktop users, Google Slides reserves this ability for eligible paid accounts.
It’s important to understand the difference between adjusting transparency and true background removal. Adjusting transparency in Google Slides does not fully remove backgrounds; it simply lowers the opacity of the whole image, subject included.
True background removal isolates your subject and makes the surrounding area transparent—critical for layering pictures over colored slides or other elements.
As of 2025–2026, the native background remover is gradually rolling out to eligible editions, but for many users, the most reliable method remains using an external AI background remover to create an image with a transparent background, then inserting that edited image into Google Slides.
This article focuses specifically on the Google Slides workflow; separate guides already cover background removal in PowerPoint, Word, Photoshop, and on iPhone.
Method 1: Use Google Workspace Labs “Remove background” in Google Slides
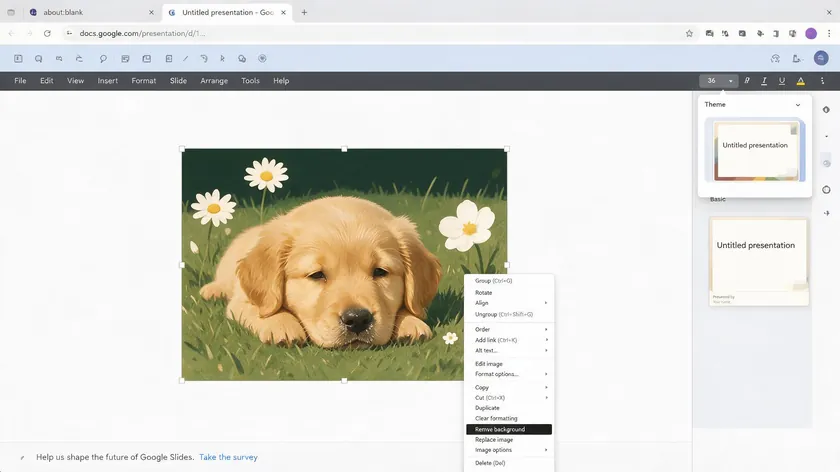
Native one-click background removal is subject to your Google account or Workspace setup. If your account qualifies, this is the fastest route. Here’s the process:
- Open Google Slides. Navigate to slides.google.com in your browser, sign into your Google Workspace account, and open an existing deck or create a new blank presentation.
- Insert or select an image. Go to Insert → Image and upload from your computer, Google Drive, or the web. Click the image so its blue selection handles appear.
- Find the background remover. Right-click the image and look for “Edit image” → “Remove background,” or check the top menu under Format → Image. This option only shows up for accounts with Google Workspace Labs or Gemini access.
- Click Remove Background. Google’s AI will analyze the picture and remove the image background automatically. The cut-out replaces the original in place on your slide.
- Undo and version history. Once the background is successfully removed, you cannot restore it with “Reset image.” Instead, use Undo (Ctrl+Z / Cmd+Z) or File → Version history to revert.
- Troubleshooting. If the remover misses fine areas, try adjusting contrast and brightness first—this can help the background removal tool distinguish subjects more clearly. If the feature isn’t available in your account at all, Method 2 is your universal option.
This native workflow is the fastest route when your account qualifies, since everything happens inside Google Slides without switching tools. If Google Workspace Labs isn’t available yet, the external tool workflow below works the same way for every Google account.

Many users on standard Google accounts won’t see the Labs background remover, so third-party tools are needed for complete background removal in Google Slides.
Dedicated AI web tools are reliable alternatives for background removal, and using external background-removal tools can produce cleaner cutouts for difficult images like portraits with fine hair or complex edges.
- Open an AI background remover. In a new browser tab, go to RemoveBackground.app—a dedicated background removal tool designed for transparent-background exports.
- Upload your image. Drag and drop your photo or click to upload. The tool accepts PNG, JPEG, and WEBP files up to 25 megapixels and 30 MB. Choose high-quality images for the best results.
- Run background removal. The AI will automatically detect the subject and remove the background from images in just a few clicks—no manual brushing required in most cases. Various other options exist in the market, including popular online background removal tools and services with features like AI background creation, but RemoveBackground.app is purpose-built for this workflow.
- Refine and download. Preview the result, make any minor adjustments, then download the edited image as a PNG to preserve transparency. Images should be downloaded as PNG because JPG does not support transparent backgrounds.
- Re-insert into Google Slides. Return to your Google Slides tab, choose Insert → Image → Upload from computer, and place the background-transparent PNG on your slide.
- Position and scale. Resize by dragging from the corners to avoid distortion. Use Arrange → Order to layer the cut-out in front of or behind other elements, and align it with text boxes or diagrams to create stunning visuals.
This method works for all Google Slides users, regardless of Google Workspace Labs access, and keeps your design process moving without desktop software.
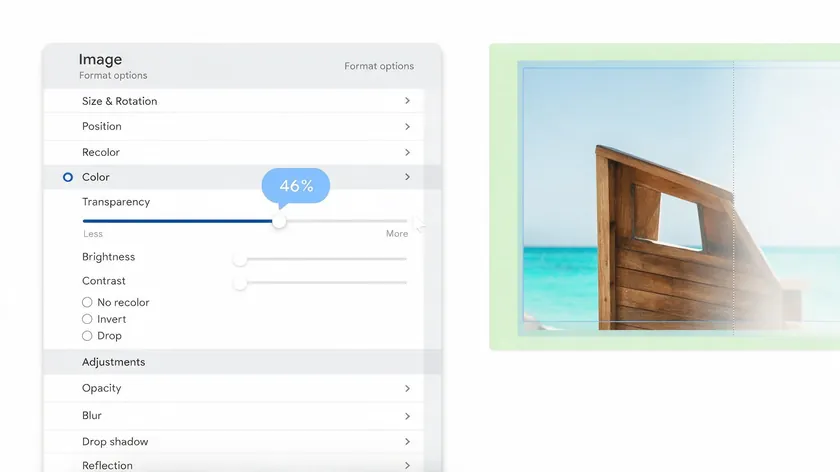
Google Slides cannot selectively erase only the background using Format options, but you can still achieve faded or semi-transparent effects that sometimes solve the design problem. Transparency adjustments help overlay images without blocking content underneath.
- Select the image. Open Google Slides and click the picture you want to adjust so it’s highlighted on the slide.
- Open format options. From the toolbar or top menu, go to Format → Format options, which opens a sidebar on the right side of the screen.
- Adjust transparency. Expand the Adjustments section and locate the Transparency slider. Adjust image transparency using the slider to make the entire image more transparent—useful when blending a photo into a colored slide background. You can also adjust transparency for shapes or images layered over slide backgrounds.
- Combine with shapes and masks. Place the semi-transparent image on top of a solid shape or gradient, or use the crop/shape mask dropdown to hide unwanted edges. This won’t make the image background transparent in a true sense, but it can reduce visual clutter. This method saves time when you don’t need a perfect cut-out—like softening a busy stock photo behind big headings—without processing the image externally.
Format options work best as a quick patch rather than a full fix, since the original background never actually leaves the file. For a true cut-out you can reuse across multiple slides, the external tool workflow in Method 2 remains the more reliable choice.
Practical workflow examples for common Google Slides use cases
Profile photos and team slides

Remove the background from employee headshots using Google Workspace Labs or RemoveBackground.app, then insert the cut-outs and align them in a grid layout for “About us” slides. This lets you experiment with colored shapes behind each photo for a uniform, professional look.
Product mockups and screenshots

Clean up product photos by removing distracting image backgrounds, then place them on brand-colored rectangles inside Google Slides. This approach helps your audience focus on the product rather than a cluttered scene.
Logos and icons
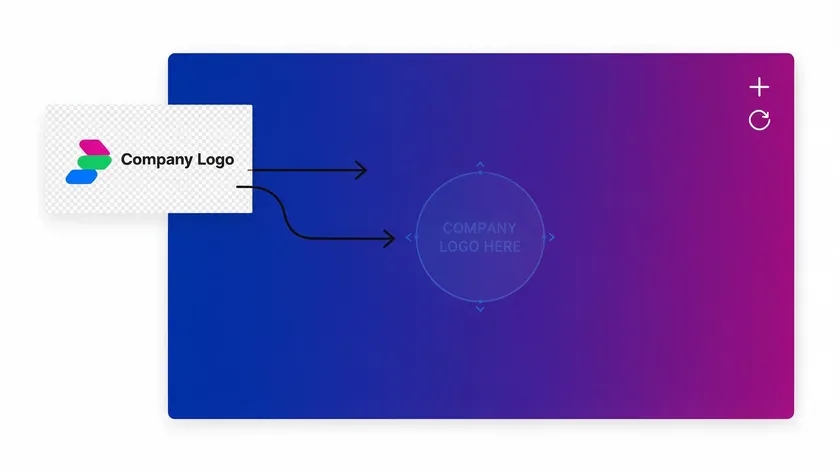
For brand logos, you want a fully transparent background PNG so the logo sits cleanly over any slide background without white boxes. Clean up any background artifacts externally, then drop the logo into your presentation.
Before/after comparison
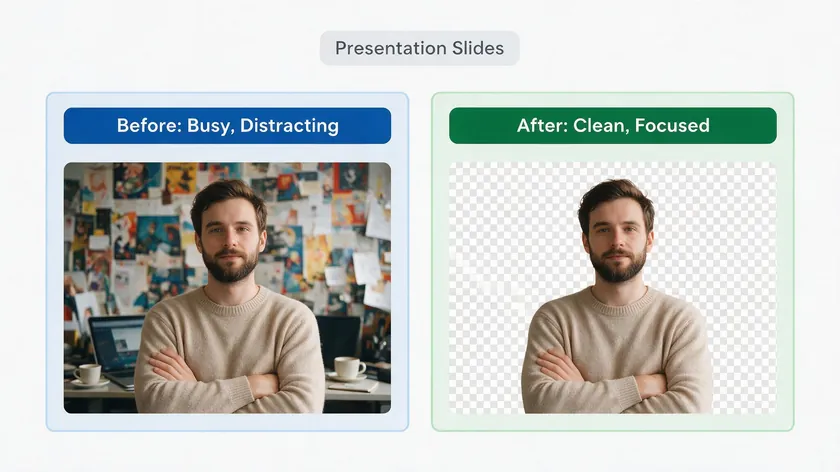
Create a two-column layout where one side shows the original photo with its background and the other shows the edited image with the background removed. This is an effective way to enhance a pitch deck and sign off on a visual direction with stakeholders.
For more advanced topics—like making a logo transparent, saving images with transparent backgrounds, or dealing with baked-in checkerboard patterns—check the dedicated guides on this website rather than duplicating those workflows here.
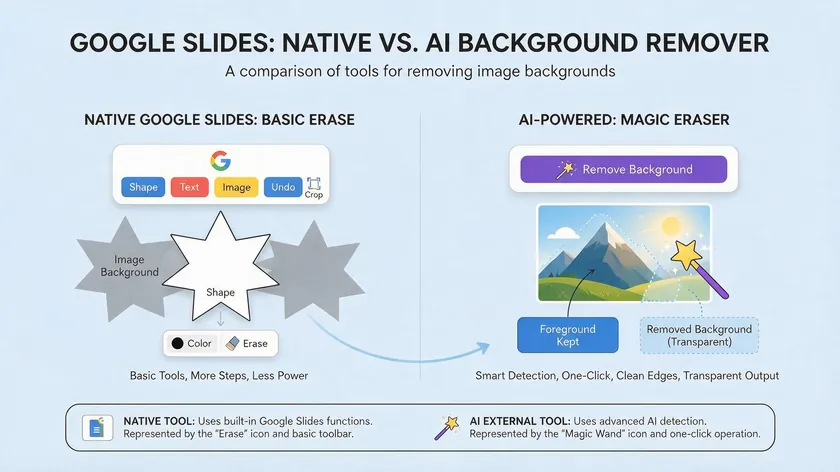
Presenters often wonder whether Google Slides alone is enough or whether they should add an AI background remover to their toolkit. Here’s a quick comparison:
| Feature | Google Slides (native) | AI remover (RemoveBackground.app) |
|---|
| True background removal | Limited, Labs-only | Purpose-built, high accuracy |
| Control over subject edges | Basic | Refined cut-outs handle hair and fine details |
| Works on any Google account | No, depends on Google Workspace Labs access | Yes, browser-based |
| Ideal use | Light edits, quick tweaks | Preparing polished images for important decks |
Google Slides’ built-in tools are convenient and integrated with Google Workspace, making them fine for quick transparency tweaks or simple removes when the Labs feature is available.
For teams that already pay for a full desktop suite, Adobe Photoshop and Canva also include background removal options, though both come with their own subscription costs and a steeper learning curve than a browser-based tool.
An AI background remover like RemoveBackground.app delivers high-quality cut-outs consistently across many images and supports complex image backgrounds, all without leaving your browser.
The ideal workflow combines Google Slides for layout, text, and creativity with a dedicated background remover for image cleanup—letting you save time and create polished visuals without complex desktop software.
Key Takeaways
- Google Slides can adjust transparency and, for some Google Workspace Labs users, remove backgrounds directly, but coverage is still limited across account types.
- The most dependable workflow is to remove the background externally with an AI background remover such as RemoveBackground.app, then insert the edited PNG into your slide.
- Use Format options → Adjustments → Transparency to create “soft” backgrounds when you don’t need a perfect cut-out.
- Plan your slide layout around clean, background-transparent images so text, icons, and charts remain easy to read.
- Combine Google Slides’ layout tools with a dedicated background remover to get professional-looking presentations without complex desktop software.
To quickly clean up your slide images, head to RemoveBackground.app, upload your photo, let the AI remove the background, download the transparent PNG, and drop it straight into your Google Slides presentation for a polished, professional look.
FAQ
These questions cover a few extra Google Slides-specific details that didn’t fit neatly into the main walkthroughs above.
Can I remove the background of a picture on Google Slides without Google Workspace Labs?
Google Slides alone cannot reliably erase just the background for most users—without Labs, you only have crop, mask, and transparency controls. The practical workaround is to remove the background in an external AI tool like RemoveBackground.app and then re-insert the edited image. This is the same workflow described in Method 2 and works on any standard Google account.
The built-in background remover is tied to Google Workspace Labs and Gemini features, which roll out gradually and only to certain Google Workspace and Google One AI Premium subscriptions. Personal accounts or unmanaged domains may not have it yet.
Confirm that an image is actually selected on your slide, check your account eligibility with your workspace admin, and use an external background remover if the option is still missing.
PNG is the preferred format when you want an image background transparent in Google Slides because it preserves the alpha channel. JPG and JPEG do not support transparency and will replace any transparent areas with a solid color.
Always choose PNG when downloading from RemoveBackground.app or any other AI background remover before inserting it into your presentation.
Will background-transparent images stay transparent when I present or export the slides?
Images retain transparency in slideshow mode in Google Slides, and transparency is preserved in most exports like PDF, as long as the original file genuinely contains an alpha channel. If you see a white box instead of a transparent area, the file was likely saved in a non-transparent format—re-export the asset as a PNG with transparency enabled.
Can I fine-tune which parts of an image background are removed?
Native Google Slides controls offer very limited fine-tuning beyond basic cropping and masking. Dedicated AI background removers usually provide a better default cut-out and sometimes include simple tools to restore or erase specific areas. If you need pixel-level control, combine an AI remover with more detailed editing in a capable image editor, then bring the finished result back into Google Slides.